Introduction
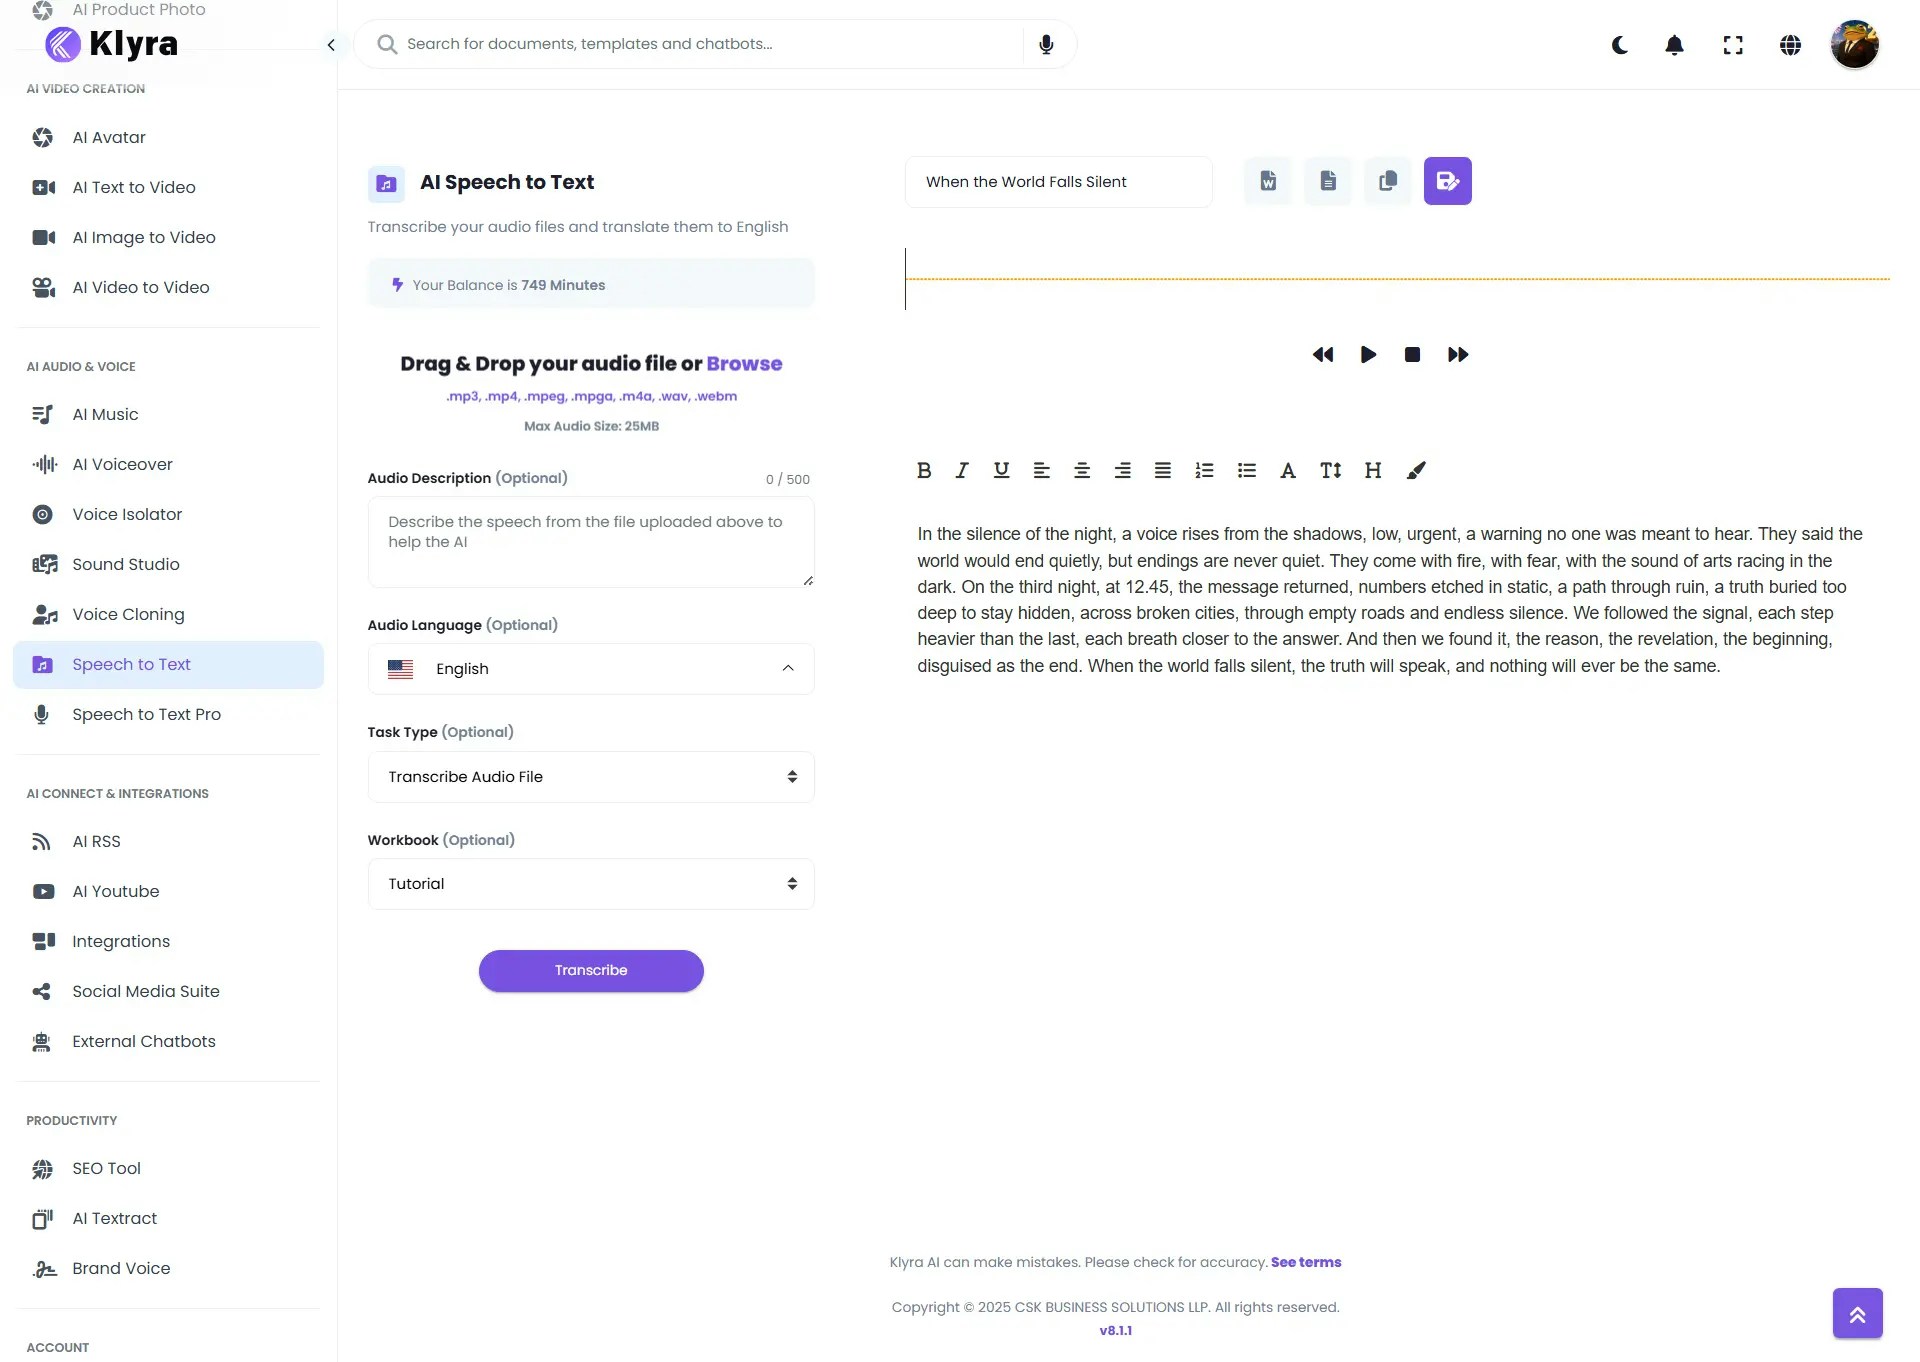
The AI Speech to Text feature allows you to seamlessly transcribe audio and video files into accurate, editable text. Whether you’re working with mp3 lectures, wav interviews, m4a podcasts, or mp4 recordings, Klyra AI supports a wide range of formats. With 25+ supported languages, automatic detection, and the ability to export transcriptions in multiple formats, this tool is ideal for content creators, professionals, educators, and researchers who need fast and reliable transcription.How to Use
🔎 Navigation: Dashboard → Left Panel → AI Audio & Voice → Speech to Text
Upload your audio file
- Drag & Drop or click Browse to upload your audio file.
- Supported formats: mp3, mp4, mpeg, mpga, m4a, wav, webm.
Add Audio Description (Optional)
- Provide a short description of your audio file (e.g., “Team meeting on project roadmap”).
- This helps AI contextualize and improve transcription accuracy.
Set Audio Language (Optional)
- By default, the tool uses Auto Detect.
- If needed, you can select the language manually from the dropdown list.
(Optional)
- Transcribe Audio File (default): Transcribes audio into the original language.
- Generate Transcription in English: Translates and transcribes your file into English.
Assign to a Workbook
Save your transcription in an organized folder under AI Panel → Documents → All Transcripts.
Name Your File
- By default, files are named “Audio File”.
- You can give it a more descriptive title for easier tracking.
Start Transcription
- Click the Transcribe button.
- The transcription process will begin, and progress will be shown in the workspace.
View & Edit Results
- Once transcription is complete, results will appear in the right-hand workspace.
-
You can directly edit the text to correct names, context, or special terms.

💡 Tips
- Shorten background noise: Clean audio improves accuracy.
- Language hint: If your file has mixed accents or languages, specify the main language instead of relying on Auto Detect.
- Use Workbooks: Organize transcriptions by projects (meetings, interviews, lectures).
- Quick edit in-app: Fix names, jargon, or technical terms right in the editor before exporting.
- Save in DOCX for formatting: Best for sharing with teams or editing in Word.
📌 Example Use Cases
- Journalists: Transcribe interviews into editable text.
- Students: Convert lectures and seminars into study notes.
- Businesses: Document team meetings, presentations, or training sessions.
- Podcasters: Generate transcripts for SEO and accessibility.
- Researchers: Transcribe focus groups, field interviews, or conference talks.