

AI Video Generator is part of Klyra AI’s Video workspace. It supports both prompt-based and image-based video creation without requiring a traditional video production workflow.
What you can create
Text to Video
Describe the video you want using a text prompt. Klyra AI turns the description into a dynamic video. Use Text to Video when you are starting with an idea rather than an existing visual.Image to Video
Upload an image and describe the motion or scene you want. Klyra AI uses the image as the visual starting point and generates a video around it. Use Image to Video when you already have a photograph, illustration, product visual, or other supported image.How the workflow works
1
Choose your workflow
Go to Video section in the sidebar and choose either AI Text to Video or AI Image to Video.
2
Configure the generation
Choose the available video model and set the generation options shown for the selected workflow.
3
Describe the video
For Text to Video, describe the complete scene in the prompt. For Image to Video, upload the source image and describe the motion or transformation you want.
4
Generate the video
Review the settings and click Generate Video.
5
Review the result
Generated videos appear in the workspace so you can preview and manage your creations.
Text to Video
Text to Video lets you create a video directly from a written description. Open AI Text to Video from the Video section of the Klyra AI sidebar.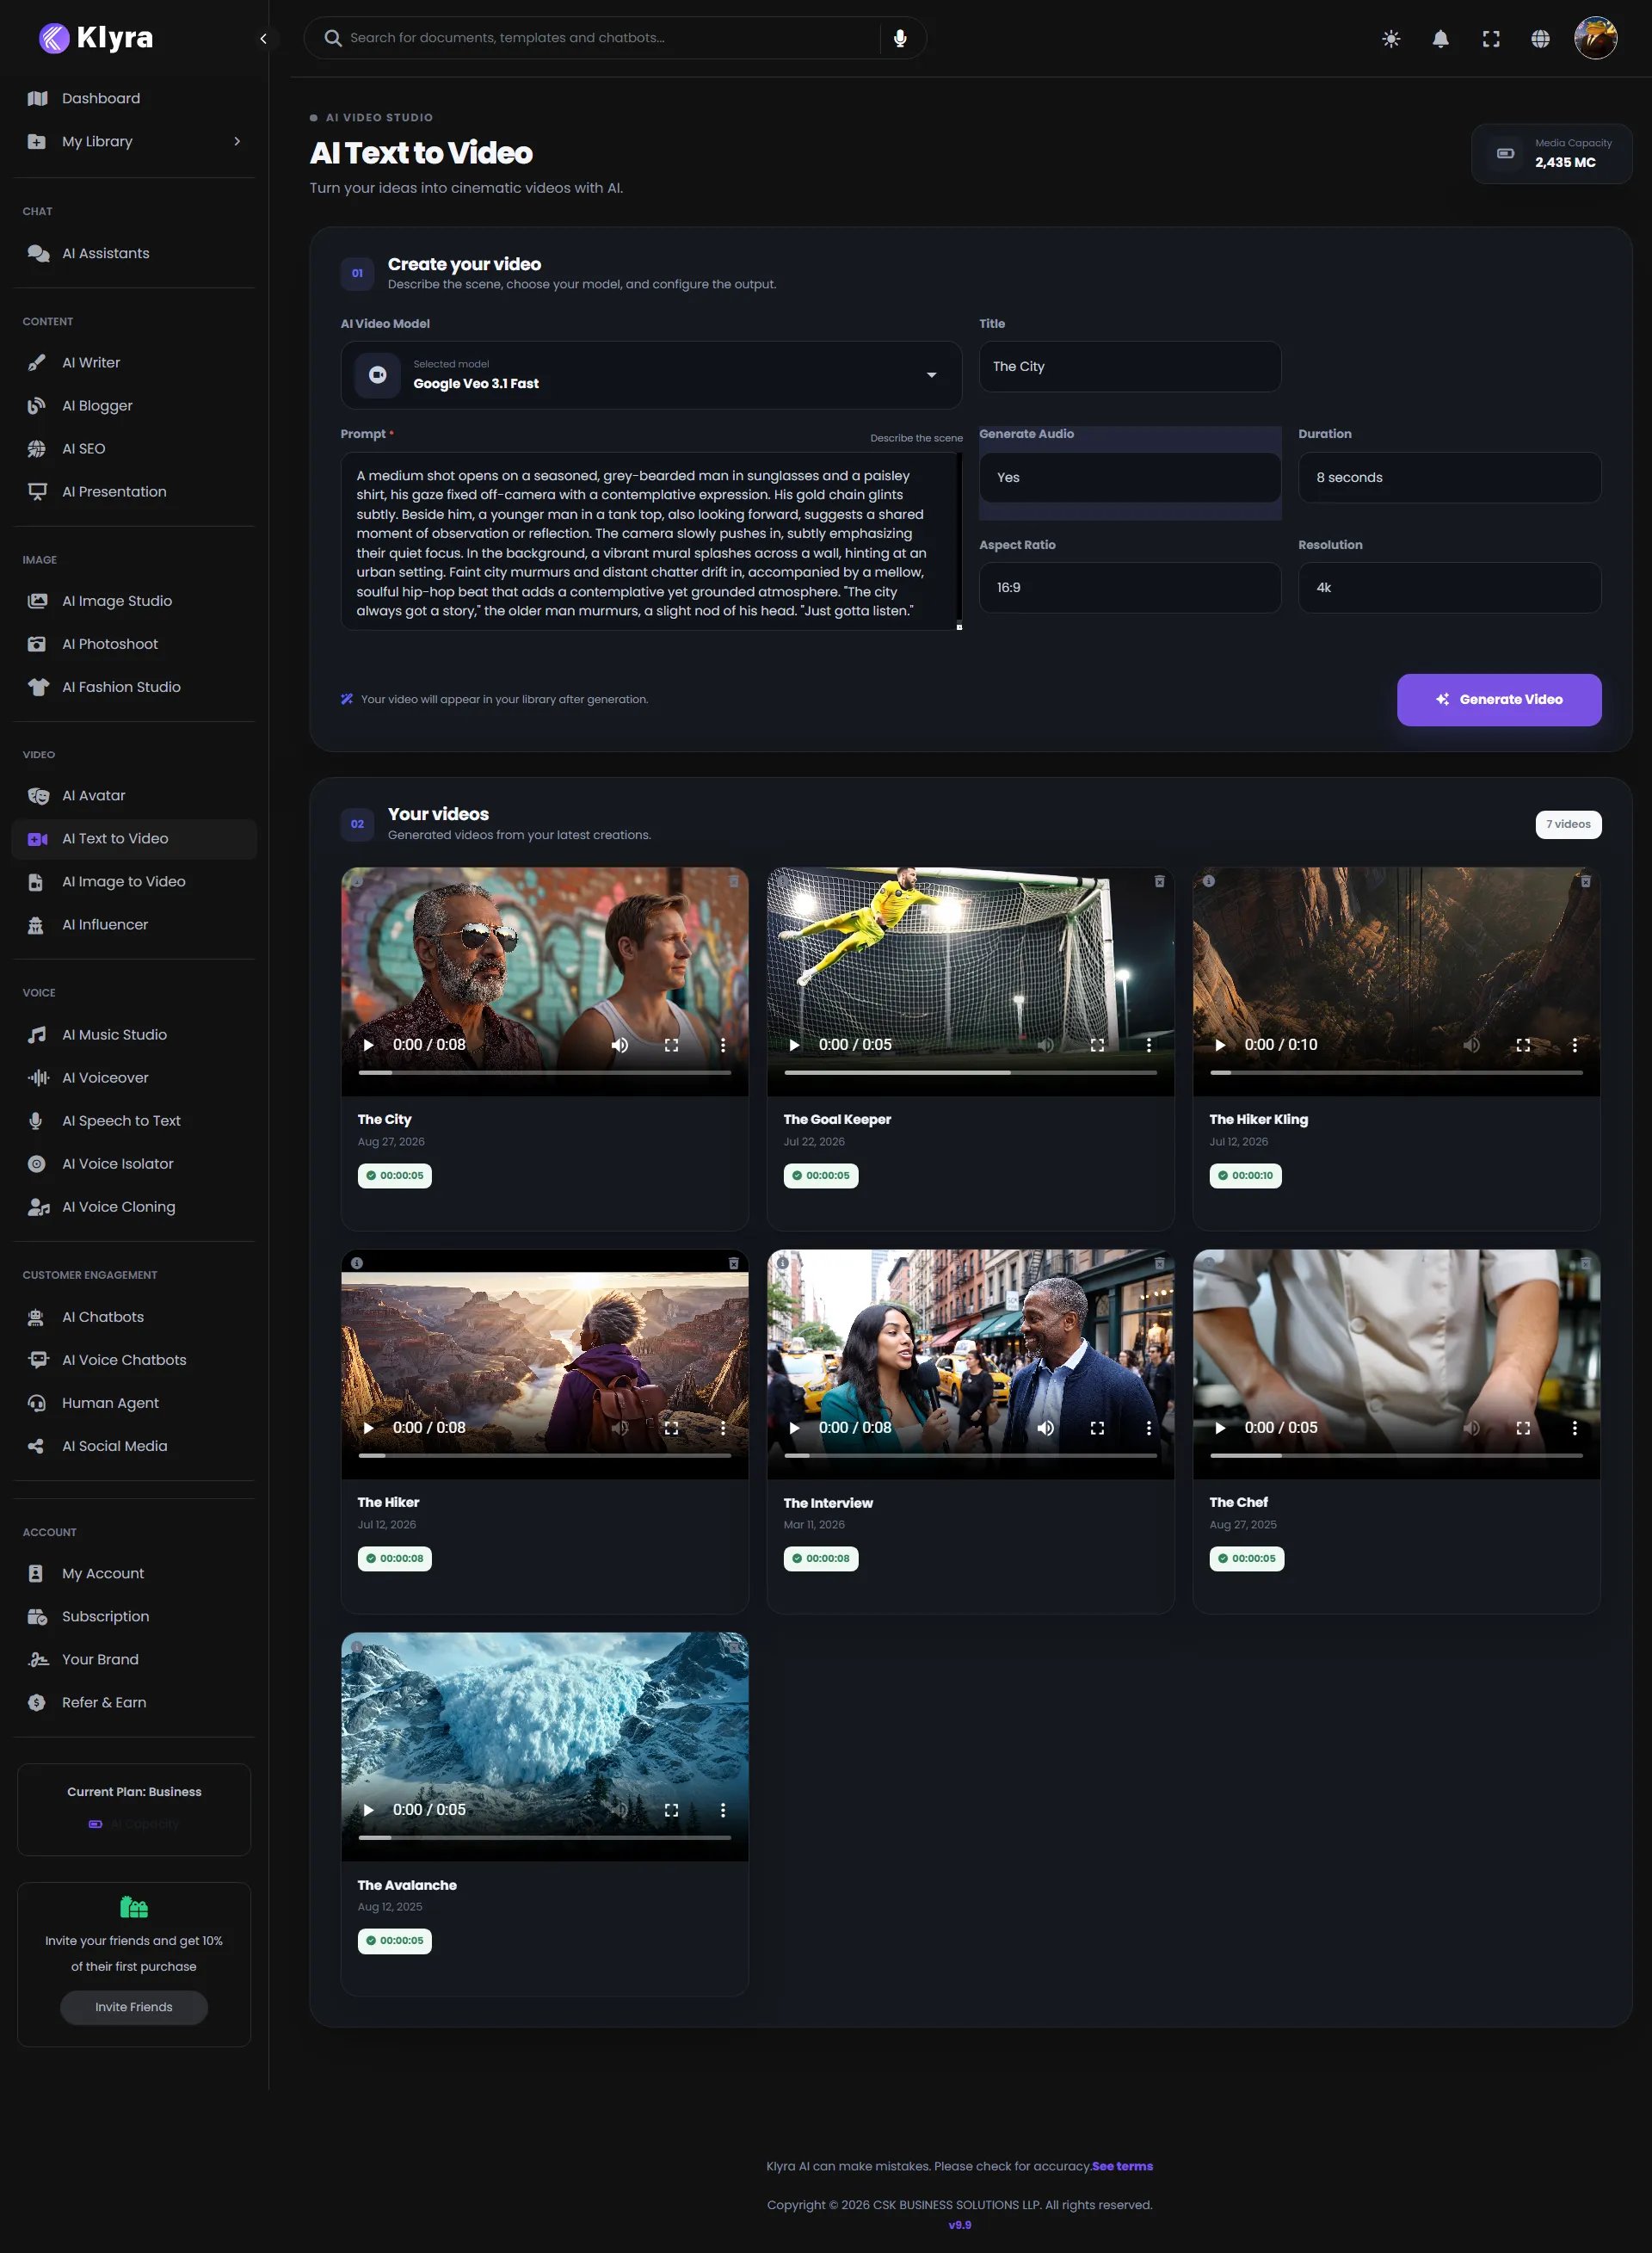
Step 1: Choose the video model
The Text to Video interface includes an AI Video Model selector. The example shown in the interface uses: Google Veo 3.1 Fast The available models may depend on the current Klyra AI configuration.Step 2: Add a title
Enter a title in the Title field. For example:The CityThe title helps you identify the generated video in your library.
Step 3: Write your prompt
Use the Prompt field to describe the video you want to create. A useful prompt can describe:- The subject
- The setting
- What is happening
- Camera or visual direction
- Dialogue, when appropriate
- The overall visual context
A medium shot opens on a seasoned, grey-bearded man in sunglasses and a paisley shirt, his gaze fixed off-camera with a contemplative expression. His gold chain glints subtly. Beside him, a younger man in a tank top, also looking forward, suggests a shared moment of observation or reflection. The camera slowly pushes in, subtly emphasizing their quiet focus. In the background, a vibrant mural splashes across a wall, hinting at an urban setting. Faint city murmurs and distant chatter drift in, accompanied by a mellow, soulful hip-hop beat that adds a contemplative yet grounded atmosphere. “The city always got a story,” the older man murmurs, a slight nod of his head. “Just gotta listen.”
Describe the intended scene clearly rather than relying on a short, ambiguous phrase. Include the important visual and narrative details you want the generated video to contain.
Step 4: Choose whether to generate audio
The Text to Video interface includes Generate Audio for certain models. The example shows: Yes When available, use this setting when you want the generated video workflow to include audio.Step 5: Select the duration
Choose the desired video duration from the Duration selector. The screenshot example shows: 8 seconds The available durations depend on the selected generation configuration.Step 6: Choose the aspect ratio
Select an Aspect Ratio. The screenshot example shows: 16:9 Choose the ratio that matches where you intend to use the video. For example:Only use aspect ratios available in the current interface. The table above explains common use cases and is not a statement that every ratio is available for every model.
Step 7: Choose the resolution
Select the desired Resolution. The screenshot example shows: 4k Higher resolutions can be useful when the final video needs additional visual detail, subject to the selected model and available configuration.Step 8: Generate the video
Once your settings are ready, click Generate Video. The generated video is added to the video library on the bottom side of the workspace.Review Text to Video results
The generated video library displays your creations as cards. A video card can show:- Video preview
- Video title
- Creation date
- Generated duration
- Information action
- Delete action
The names above are examples visible in the supplied interface screenshot. Your library will contain the videos you generate.
Preview a generated video
Use the video player on the card to preview the result. You can use the native player controls shown in the interface to:- Play or pause
- Seek through the video
- Adjust playback
- Enter fullscreen when available
Review video information
Use the information icon on a video card to access the available details for that generation.Delete a video
Use the delete icon on a video card when you want to remove a generated result.Image to Video
Image to Video starts with an existing image and turns it into a moving video. Open AI Image to Video from the Video section of the Klyra AI sidebar.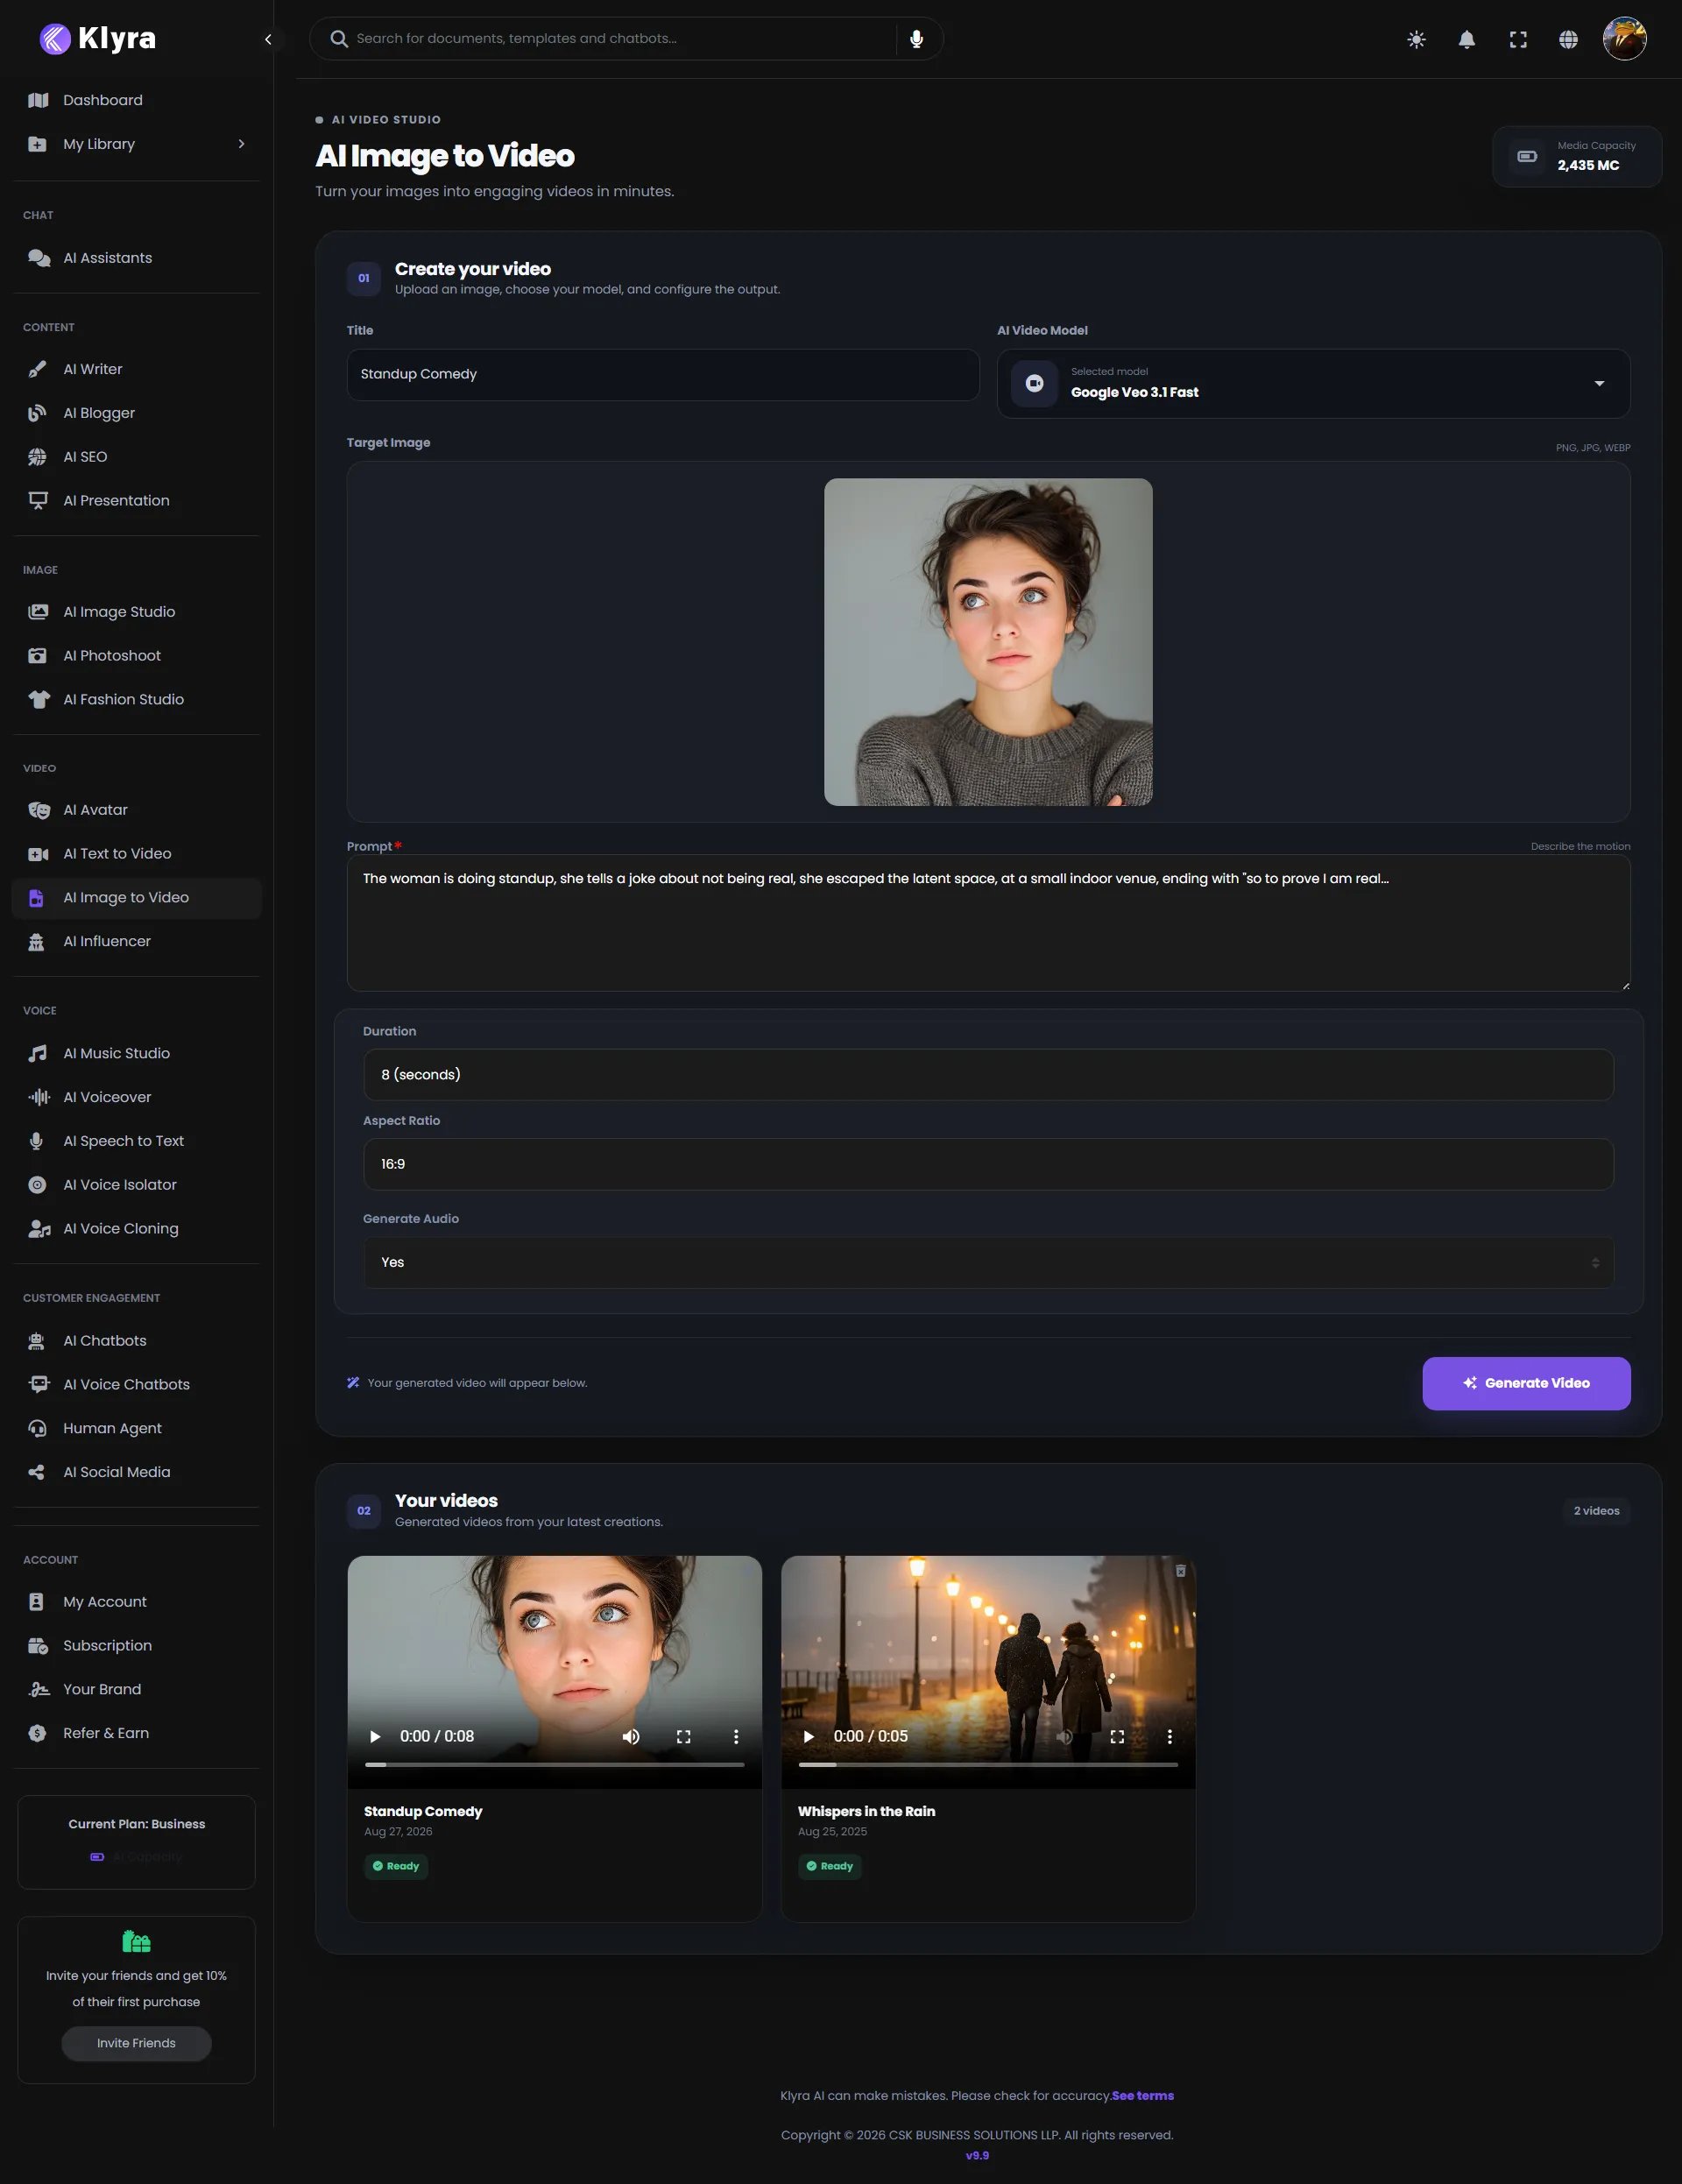
Step 1: Add a title
Enter a title in the Title field. The example shown in the interface is:Standup ComedyUse a descriptive title that makes the generated video easy to identify later.
Step 2: Upload your target image
The Target Image field is required. You can:- Drag and drop your image into the upload area.
- Click Browse to select an image.
- PNG
- JPG
- WEBP
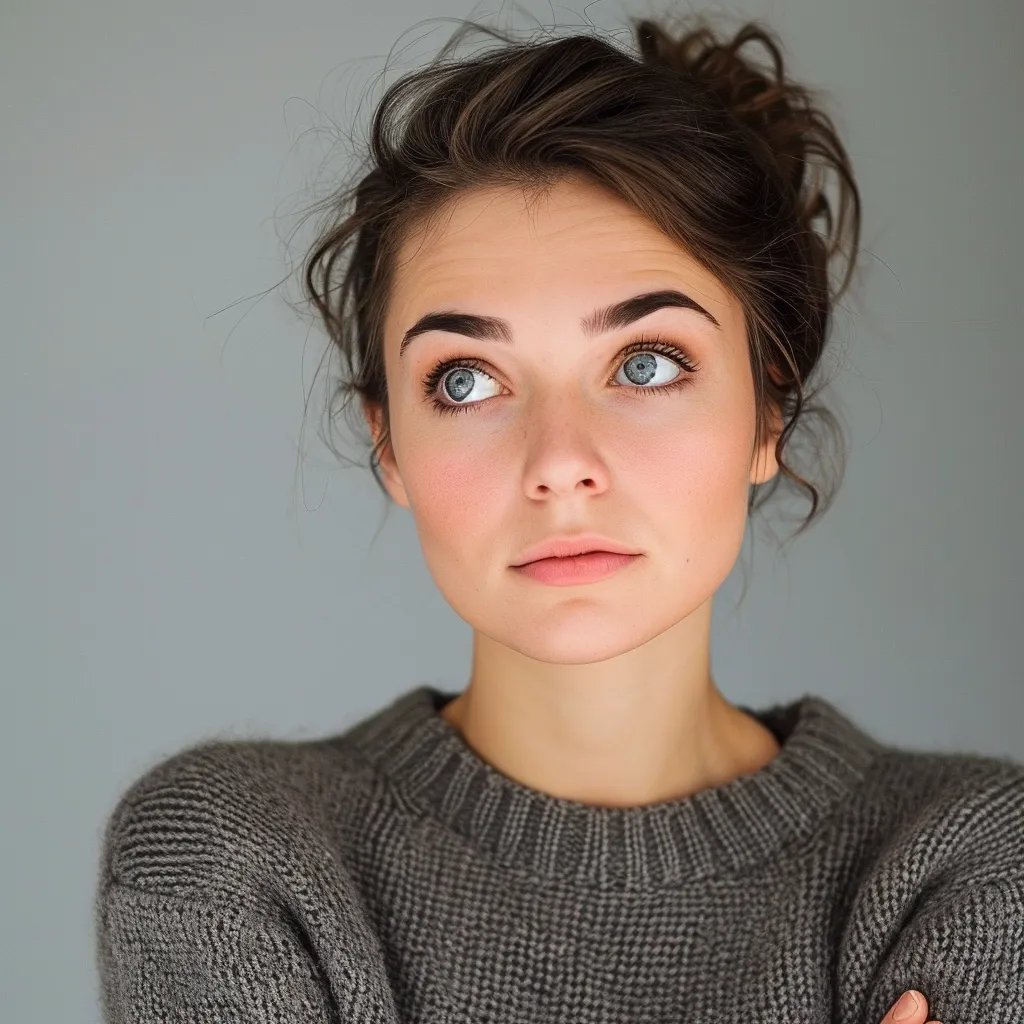
Choose an image that already contains the visual subject and composition you want to animate. The generated video uses this image as its starting point.
Step 3: Review the uploaded image
After uploading, the selected image is displayed in the generation form. In the example, the image shows two people walking along a rain-soaked path with streetlights. Review the image before continuing to make sure the intended source visual is selected.Step 4: Choose the video model
Select an AI Video Model. The screenshot example uses: Google Veo 3.1 Fast The available model options may vary according to the current Klyra AI configuration.Step 5: Describe the motion
The Prompt field is required. For Image to Video, your prompt should focus on how the still image should become a video. Useful instructions can describe:- Subject movement
- Environmental movement
- Camera movement
- Lighting changes
- Atmospheric motion
- The desired visual mood
The woman is doing standup, she tells a joke about not being real, she escaped the latent space, at a small indoor venue, ending with “so to prove I am real…
When starting from an image, avoid rewriting the entire image description unless necessary. Focus the prompt on the movement, camera behavior, and visual changes you want to see.
Step 6: Select the duration
Choose the video Duration. The screenshot example shows: 8 seconds The available durations depend on the selected generation configuration.Step 7: Choose the aspect ratio
Select an Aspect Ratio. The screenshot example shows: 16:9 Choose the ratio that best matches the source image and the intended destination.Step 8: Choose whether to generate audio
The Image to Video interface includes Generate Audio for certain models. The example shows: Yes When available, use this setting when you want the generated video workflow to include audio.Step 9: Generate the video
Click Generate Video. The generated result appears in the video library on the bottom.Review Image to Video results
The result card displays the generated video with its title and creation date. Preview the video using the player controls. Use the available delete control if you want to remove the generated result.Text to Video vs Image to Video
Choose Text to Video when
Use Text to Video when:- You have an idea but no starting image.
- You want AI to create the visual scene from your description.
- You want to describe the subject, environment, action, and narrative in one prompt.
Choose Image to Video when
Use Image to Video when:- You already have the image you want to animate.
- You need to preserve the visual identity of an existing image.
- You want to control the starting composition and add motion to it.
Writing better video prompts
A strong video prompt should make the intended result easy to understand.For Text to Video
A useful structure is:For Image to Video
A useful structure is:These prompt examples are guidance for writing prompts. They are not taken from the supplied interface.
A practical video creation workflow
For consistent results, follow this workflow:1
Start with the intended outcome
Decide whether you need a completely generated scene or motion added to an existing image.
2
Choose the right workflow
Use Text to Video for idea-first creation and Image to Video for image-first creation.
3
Keep the prompt specific
Describe the important subject, action, camera behavior, and visual details.
4
Match the format to the destination
Choose an available aspect ratio that fits the platform or placement where the video will be used.
5
Generate and review
Preview the result before deciding whether it is ready for use.
Best practices
Start with a clear visual objective
Before writing the prompt, decide what the viewer should see happening in the video.Keep motion intentional
For Image to Video, specify the movement you actually want. Clear motion instructions make the intended animation easier to interpret.Match the aspect ratio to the destination
Choose the format before generating when possible. This reduces the need to adapt the final visual later.Use descriptive titles
A clear title makes the video library easier to search and manage as the number of generations grows.Review every generated video
AI-generated video can differ from the prompt. Preview the result and check:- Subject consistency
- Motion
- Composition
- Lighting
- Visual quality
- Audio when generated
- Overall suitability for the intended use
Troubleshooting
My uploaded image is not accepted
For Image to Video, the interface indicates support for PNG, JPG, and WEBP. Check that your source image uses one of these formats and try uploading it again.The generated video does not match my prompt
Make the prompt more specific. For Text to Video, clarify the subject, setting, action, camera direction, and important visual details. For Image to Video, focus more specifically on the movement and camera behavior you want.I want to animate an existing image
Use AI Image to Video rather than Text to Video. Upload the image as the Target Image and describe the motion you want.I want to create a video without an existing image
Use AI Text to Video and describe the complete scene in the Prompt field.I need a different video format
Review the Aspect Ratio selector and choose from the options available for your selected configuration.I want to remove an old generated video
Use the delete control on the generated video card.Quick reference
You’re ready to create videos
AI Video Generator gives you two straightforward ways to create video content:- Text to Video turns a written idea into a video.
- Image to Video turns an existing image into a moving video.