

AI Speech to Text is built for both recorded and live transcription. Choose the workflow that matches the source of your speech.
What you can do
With AI Speech to Text, you can:- Convert uploaded audio files into text.
- Convert uploaded video files into text.
- Select the primary language of the uploaded recording.
- Transcribe speech in real time with Live Transcription.
- Review the live transcript while recording.
- Copy a live transcript.
- Save a live transcript for later access.
- Review previous transcription tasks from the dashboard.
Choose your transcription workflow
AI Speech to Text provides two main workflows:
You can switch between these workflows from the AI Speech to Text navigation.
Transcribe an audio or video file
Use Transcribe Audio File when you already have a recording that you want to convert into text.Step 1: Open Transcribe Audio File
Open AI Speech to Text from the Klyra sidebar. Then select Transcribe Audio File from the app navigation. The upload workspace appears with a large file drop area.Step 2: Upload your recording
You can either:- Drag and drop your file into the upload area.
- Click Browse and select a file from your device.
The app interface describes the upload area as accepting audio or video files. The selected file is then used as the source for transcription.
Step 3: Select the primary language
Under the upload area, use Primary Language of Audio File to select the main spoken language in the recording. The interface provides a language selector. In the example shown, German is selected. Choose the language that best matches the primary spoken language in your recording.Selecting the correct primary language helps the transcription workflow interpret the recording appropriately.
Step 4: Start transcription
Once your file and primary language are selected, click Start Transcription. Klyra processes the recording and creates the transcript.Longer recordings may take longer to process. Keep the browser session available while the transcription task is being processed.
Review your transcription activity
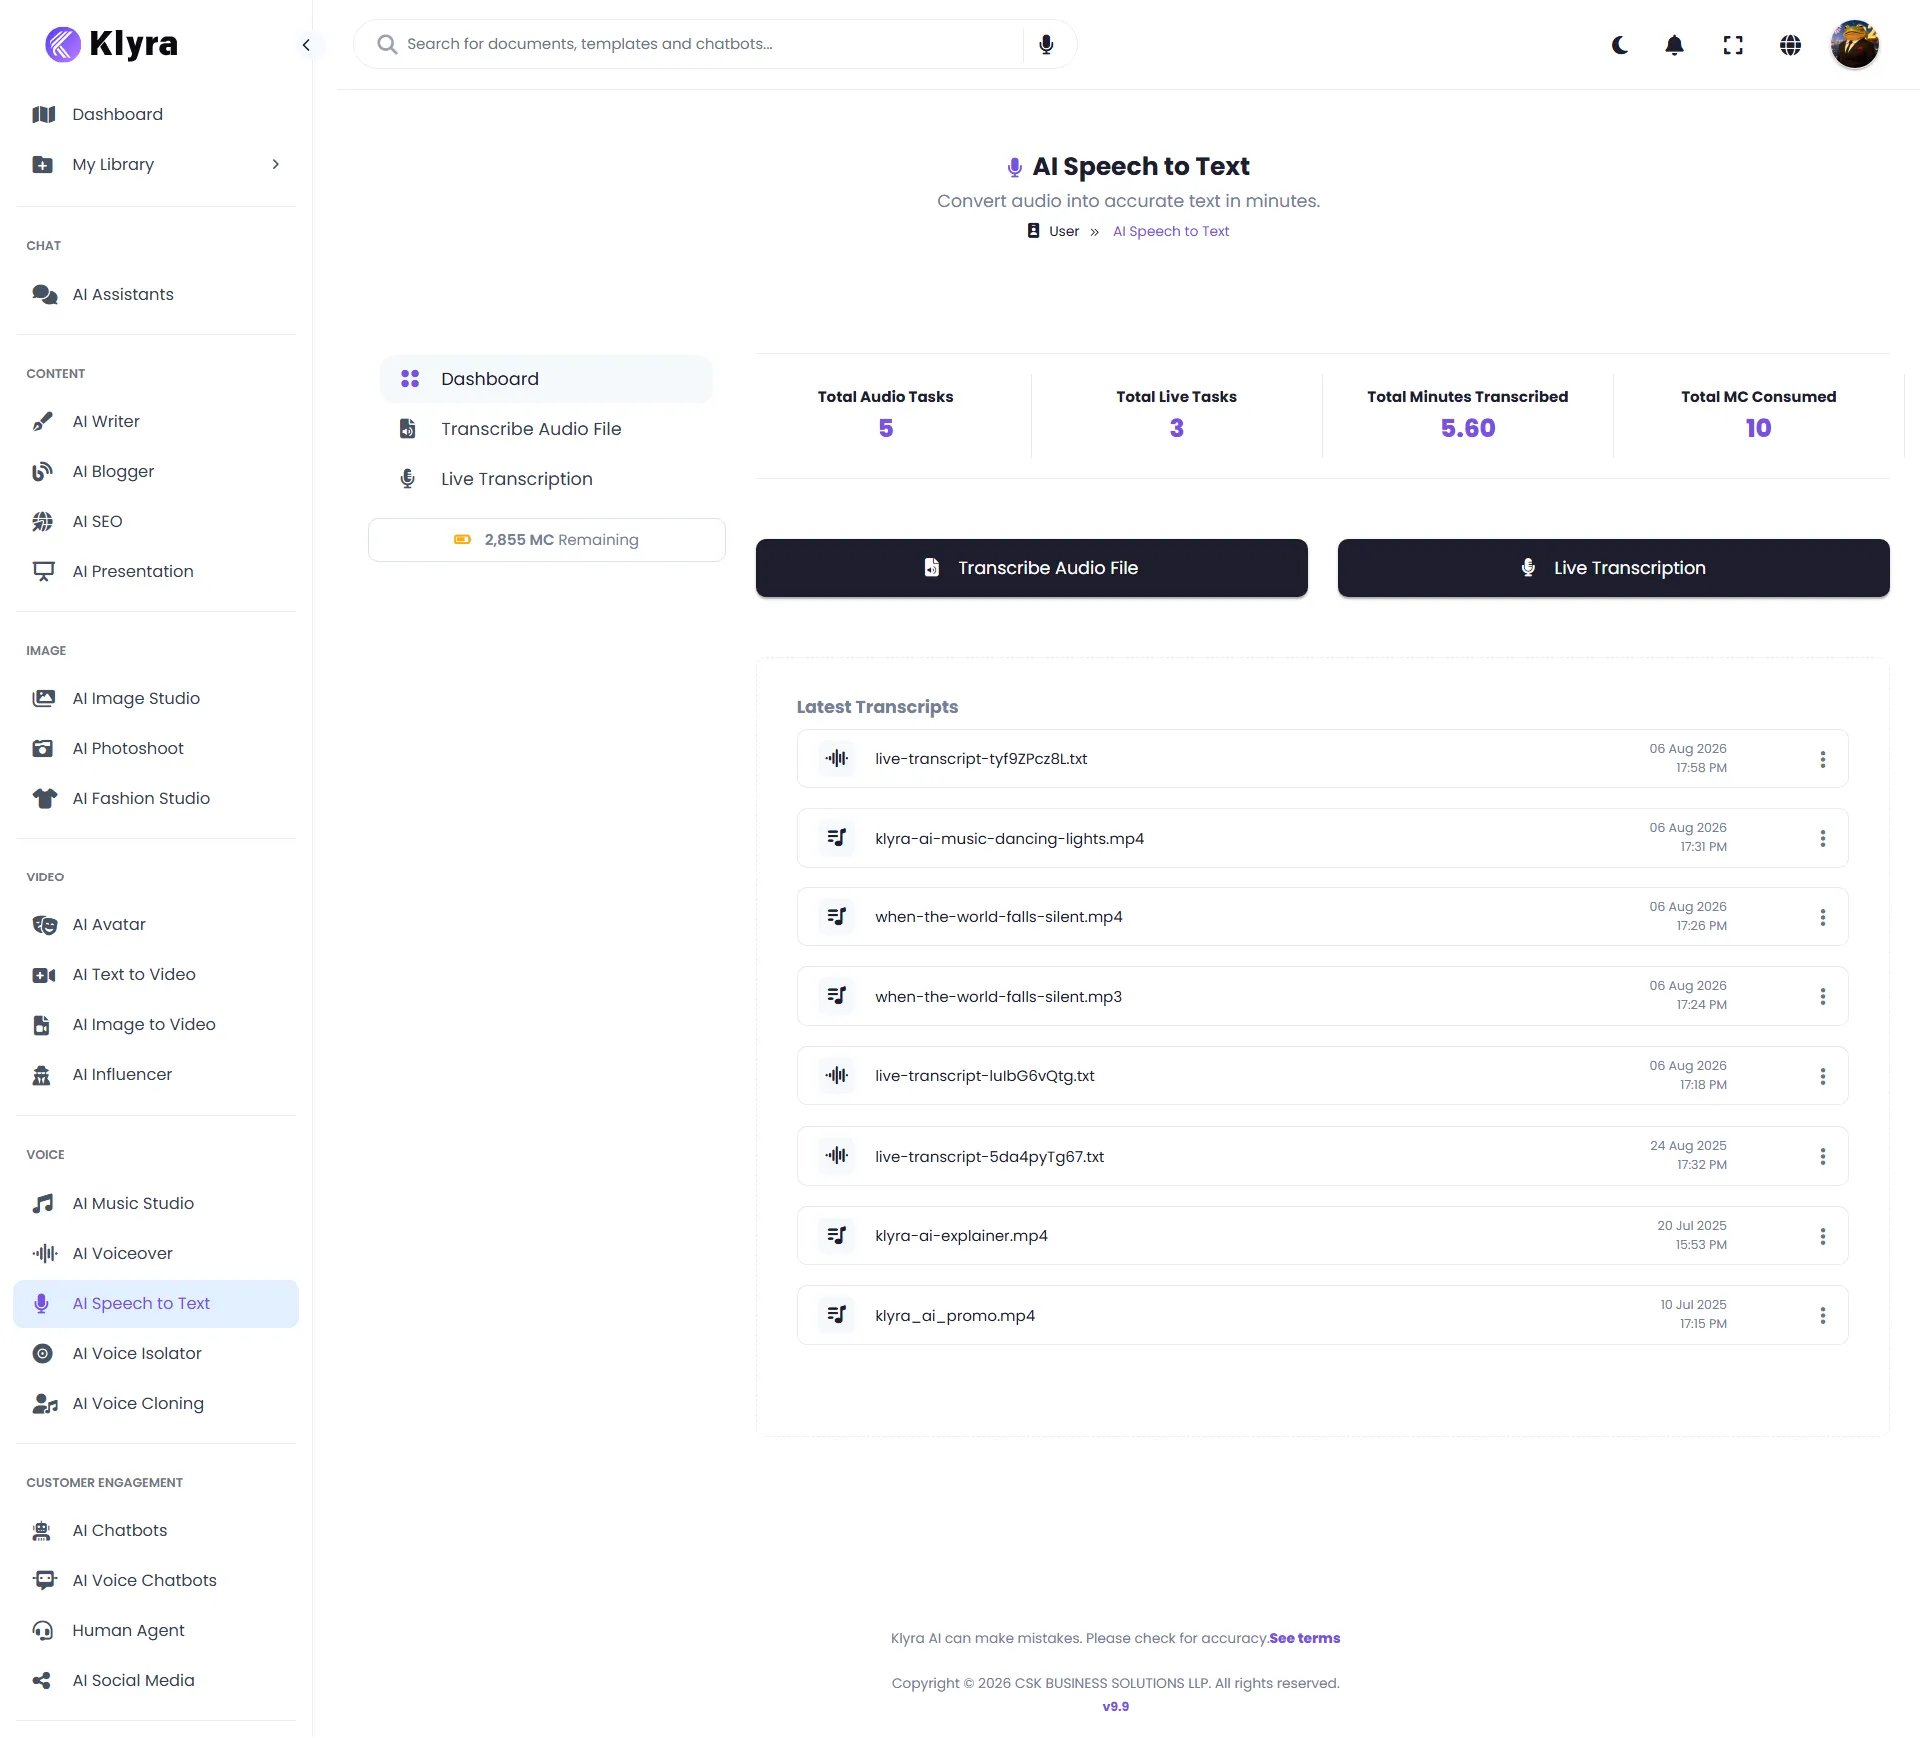
The Dashboard gives you an overview of your Speech to Text activity. The example dashboard displays:- Total Audio Tasks
- Total Live Tasks
- Total Minutes Transcribed
- Your current usage balance
- Transcribe Audio File
- Live Transcription
View your latest transcripts
The Latest Transcripts section shows recent transcription results. Items can include:- Live transcript files
- Audio recordings
- Video recordings
- Saved transcript files
Your transcript history gives you a central place to return to recent transcription work instead of starting over from the original recording.
Use Live Transcription
Use Live Transcription when you want Klyra to convert speech into text while you speak. This workflow is useful when you do not already have a finished audio file and want to see the transcript being produced in real time.Step 1: Open Live Transcription
From AI Speech to Text, select Live Transcription. The live transcription workspace opens with a recording control and transcript area.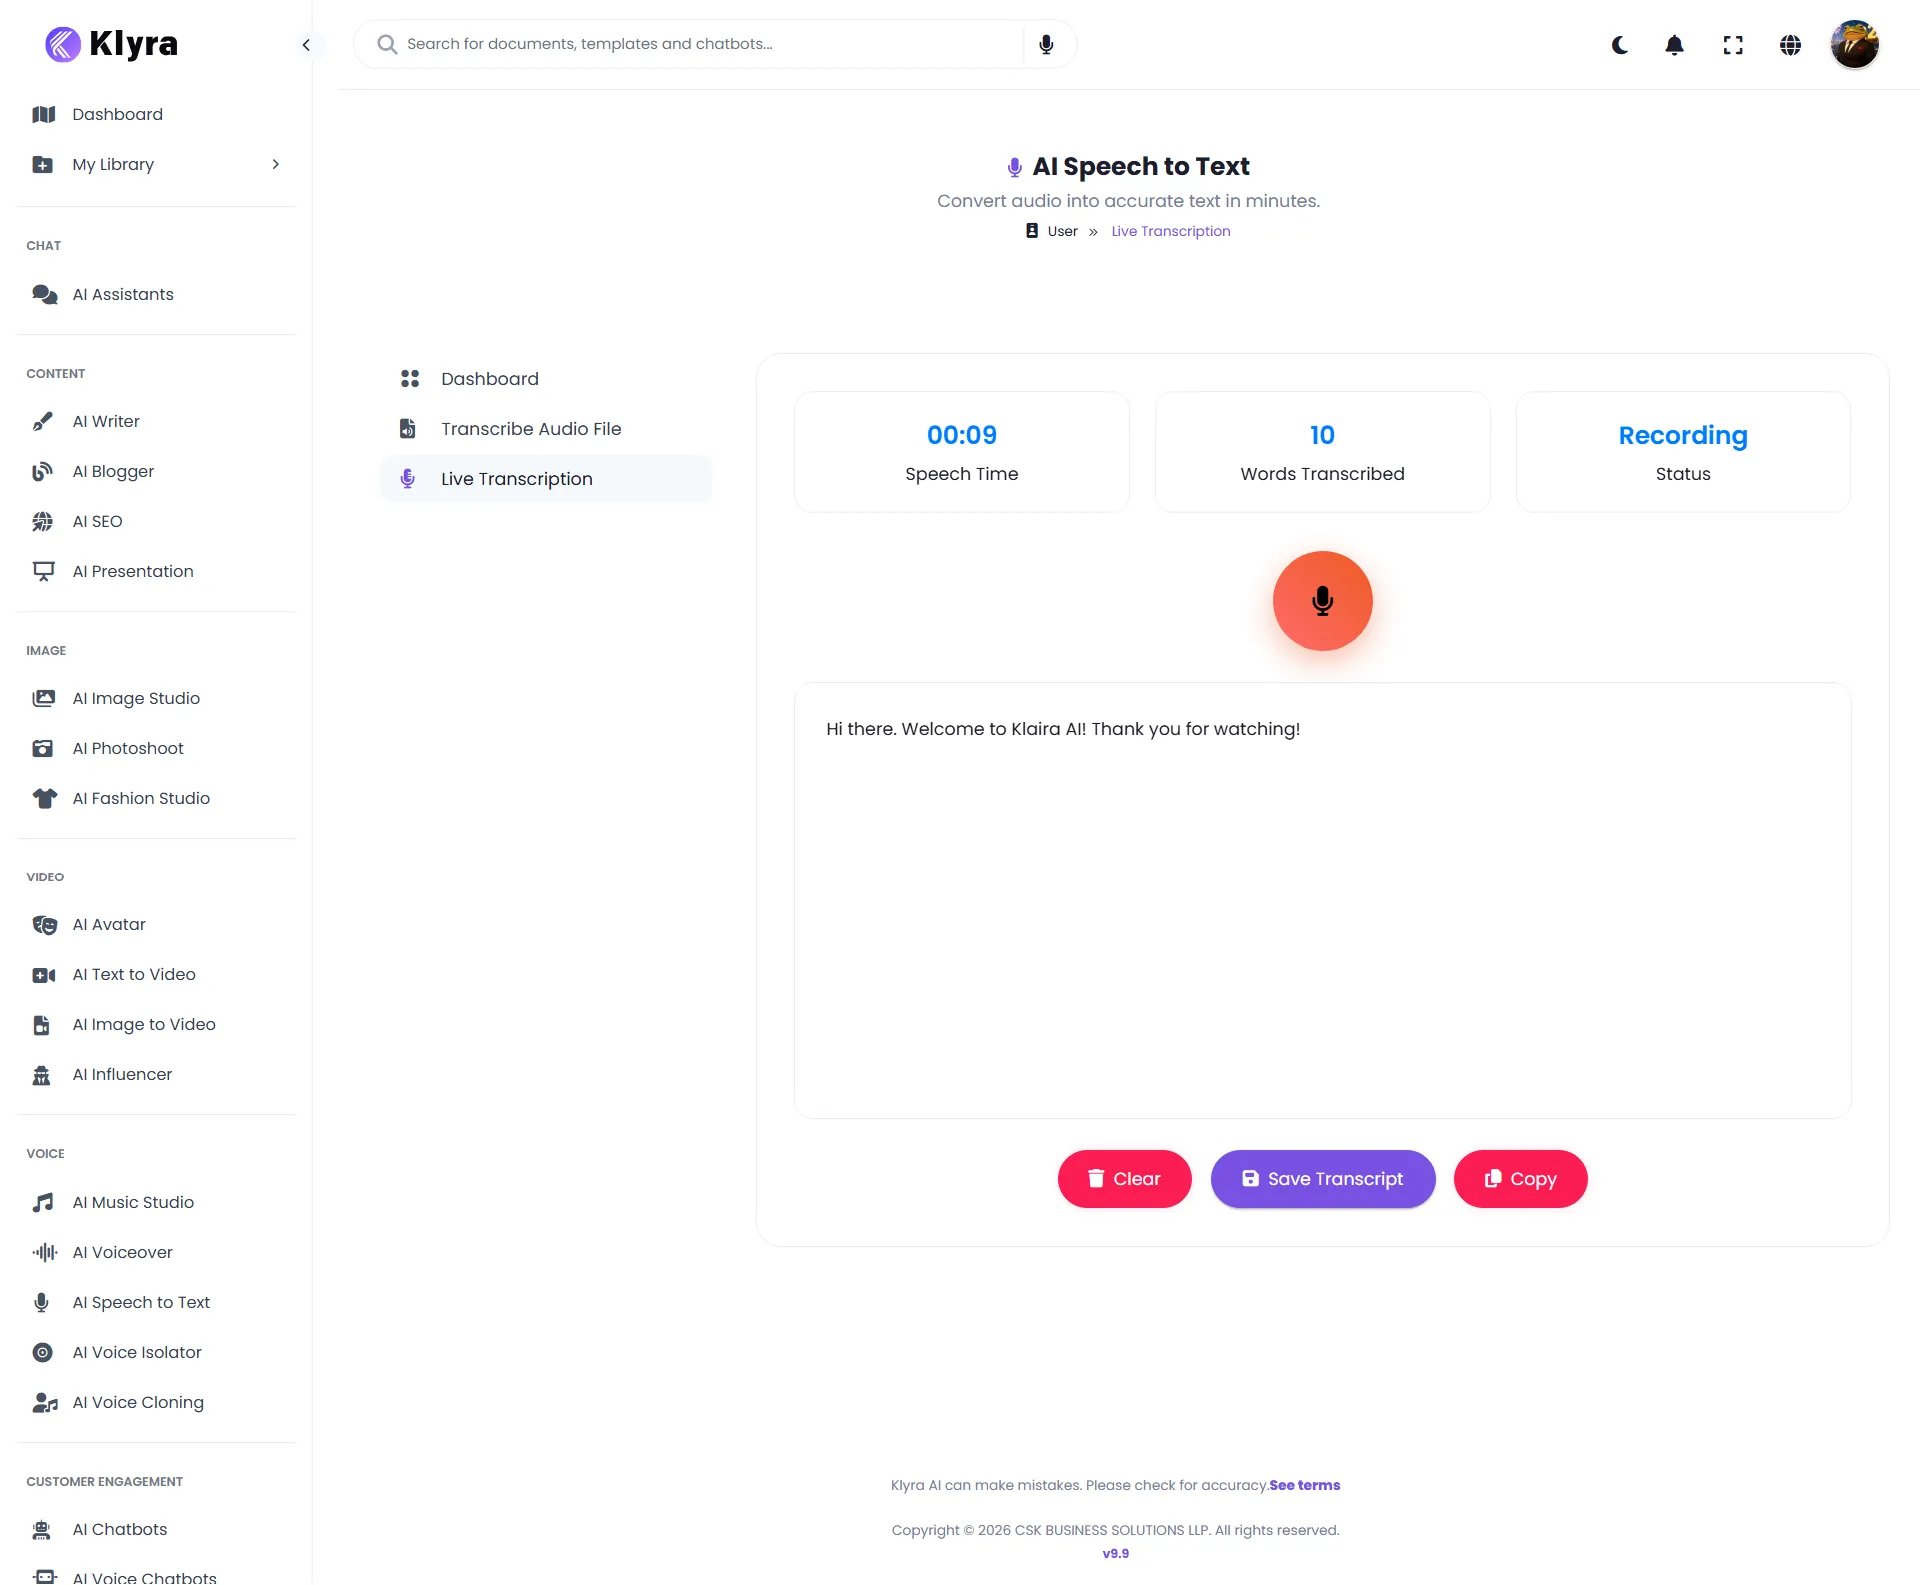
Step 2: Start recording
Click the large microphone button to begin recording. While recording, the interface displays live status information, including:- Speech Time
- Words Transcribed
- Status
Step 3: Speak naturally
Speak into your microphone while Klyra transcribes the speech. The transcript appears in the main text area as the recording progresses. In the example shown, the live transcript area contains:Hi there. Welcome to Klyra AI! Thank you for watching!The transcript can continue to grow as you speak.
Step 4: Review the live transcript
When you finish speaking, review the transcript in the main text area. Use the displayed speech time and word count as a quick reference for the recording.Step 5: Clear, save, or copy
The Live Transcription workspace provides three actions:- Clear: Remove the current transcript from the workspace.
- Save Transcript: Save the transcript for later access.
- Copy: Copy the transcript to your clipboard.
Understanding the two workflows
The two transcription modes solve different problems.Transcribe Audio File
Choose this when:- You have an existing recording.
- You need to transcribe a podcast or interview recording.
- You have a meeting recording.
- You have a video containing speech.
- You want to process a file after recording it.
Live Transcription
Choose this when:- You want text while you are speaking.
- You are capturing a live explanation or presentation.
- You want to record speech without first creating an audio file.
- You need a transcript immediately after speaking.
Transcription capabilities
Klyra AI’s product documentation describes the Speech to Text app as using leading ASR capabilities from ElevenLabs and OpenAI.Audio Transcribe
The Audio Transcribe workflow is described as using ElevenLabs Scribe models and supporting:- Up to 99 languages
- Character-level timestamps
- Speaker diarization
- Audio-event tagging
Live Transcribe
The Live Transcribe workflow uses OpenAI’s transcription capabilities for real-time speech-to-text processing.The available capabilities can depend on the current models and product configuration. The interface should be treated as the source of truth for the options available in your account.
Practical workflows
Turn a recorded interview into text
- Open AI Speech to Text.
- Select Transcribe Audio File.
- Upload the interview recording.
- Select the primary language.
- Click Start Transcription.
- Review the completed transcript from your transcription history.
Transcribe a video recording
- Open Transcribe Audio File.
- Upload the video.
- Select the primary spoken language.
- Start the transcription.
- Review the resulting transcript.
Capture a live explanation
- Open Live Transcription.
- Click the microphone button.
- Speak naturally.
- Watch the transcript appear in real time.
- Stop when you are finished.
- Copy or save the transcript.
Best practices
Select the correct primary language
When using file transcription, choose the primary language that matches the recording.Use a clear audio source
Clear speech generally makes transcription easier. When recording new audio, minimize unnecessary background noise and keep the speaker close enough to the microphone.Review important transcripts
AI transcription can make mistakes. For important meetings, interviews, published content, names, numbers, or technical terminology, review the transcript before using it as a final source.Save before clearing
If you are using Live Transcription, save or copy the transcript before selecting Clear.Use the right workflow
Do not upload a recording to the live workflow when you already have the file. Likewise, do not create a separate recording first when Live Transcription is the more direct option.Troubleshooting
My file is not appearing after upload
Try the following:- Confirm the file was selected in the upload area.
- Check that the browser has completed the upload.
- Try using Browse instead of drag and drop.
- If the issue continues, reload the page and try again.
The transcript is not accurate
Check:- The selected primary language.
- The quality of the original recording.
- Whether speakers are easy to hear.
- Whether there is substantial background noise.
- Names, numbers, and technical terminology in the final transcript.
I want to transcribe speech immediately
Use Live Transcription instead of uploading a file.I already have a recording
Use Transcribe Audio File.Quick reference
You’re ready to transcribe with AI
You now know how to:- Upload audio and video files for transcription.
- Select the primary language.
- Start a file transcription.
- Review recent transcription activity.
- Use Live Transcription.
- Record speech in real time.
- Review a live transcript.
- Save or copy a transcript.
- Choose the right workflow for recorded or live speech.