

What you can do
AI Fashion Studio brings several fashion workflows into one workspace:- Photoshoot Studio: combine wardrobe items with a model, pose, background, lighting, and aspect ratio.
- Virtual Try-On Studio: upload a model and add garments slot-by-slot.
- Change Model: replace the model while keeping the outfit, pose, and scene.
- Create Video: turn a fashion still into a cinematic keyframe using a motion preset.
- My Wardrobe: keep reusable fashion products organized in one library.
- My Photoshoots: browse and manage generated fashion creations.
Open AI Fashion Studio
From the Klyra AI workspace, open AI Fashion Studio. The main screen gives you a quick overview of your fashion workspace, including photoshoots, video keyframes, wardrobe items, favorites, and the available AI tools.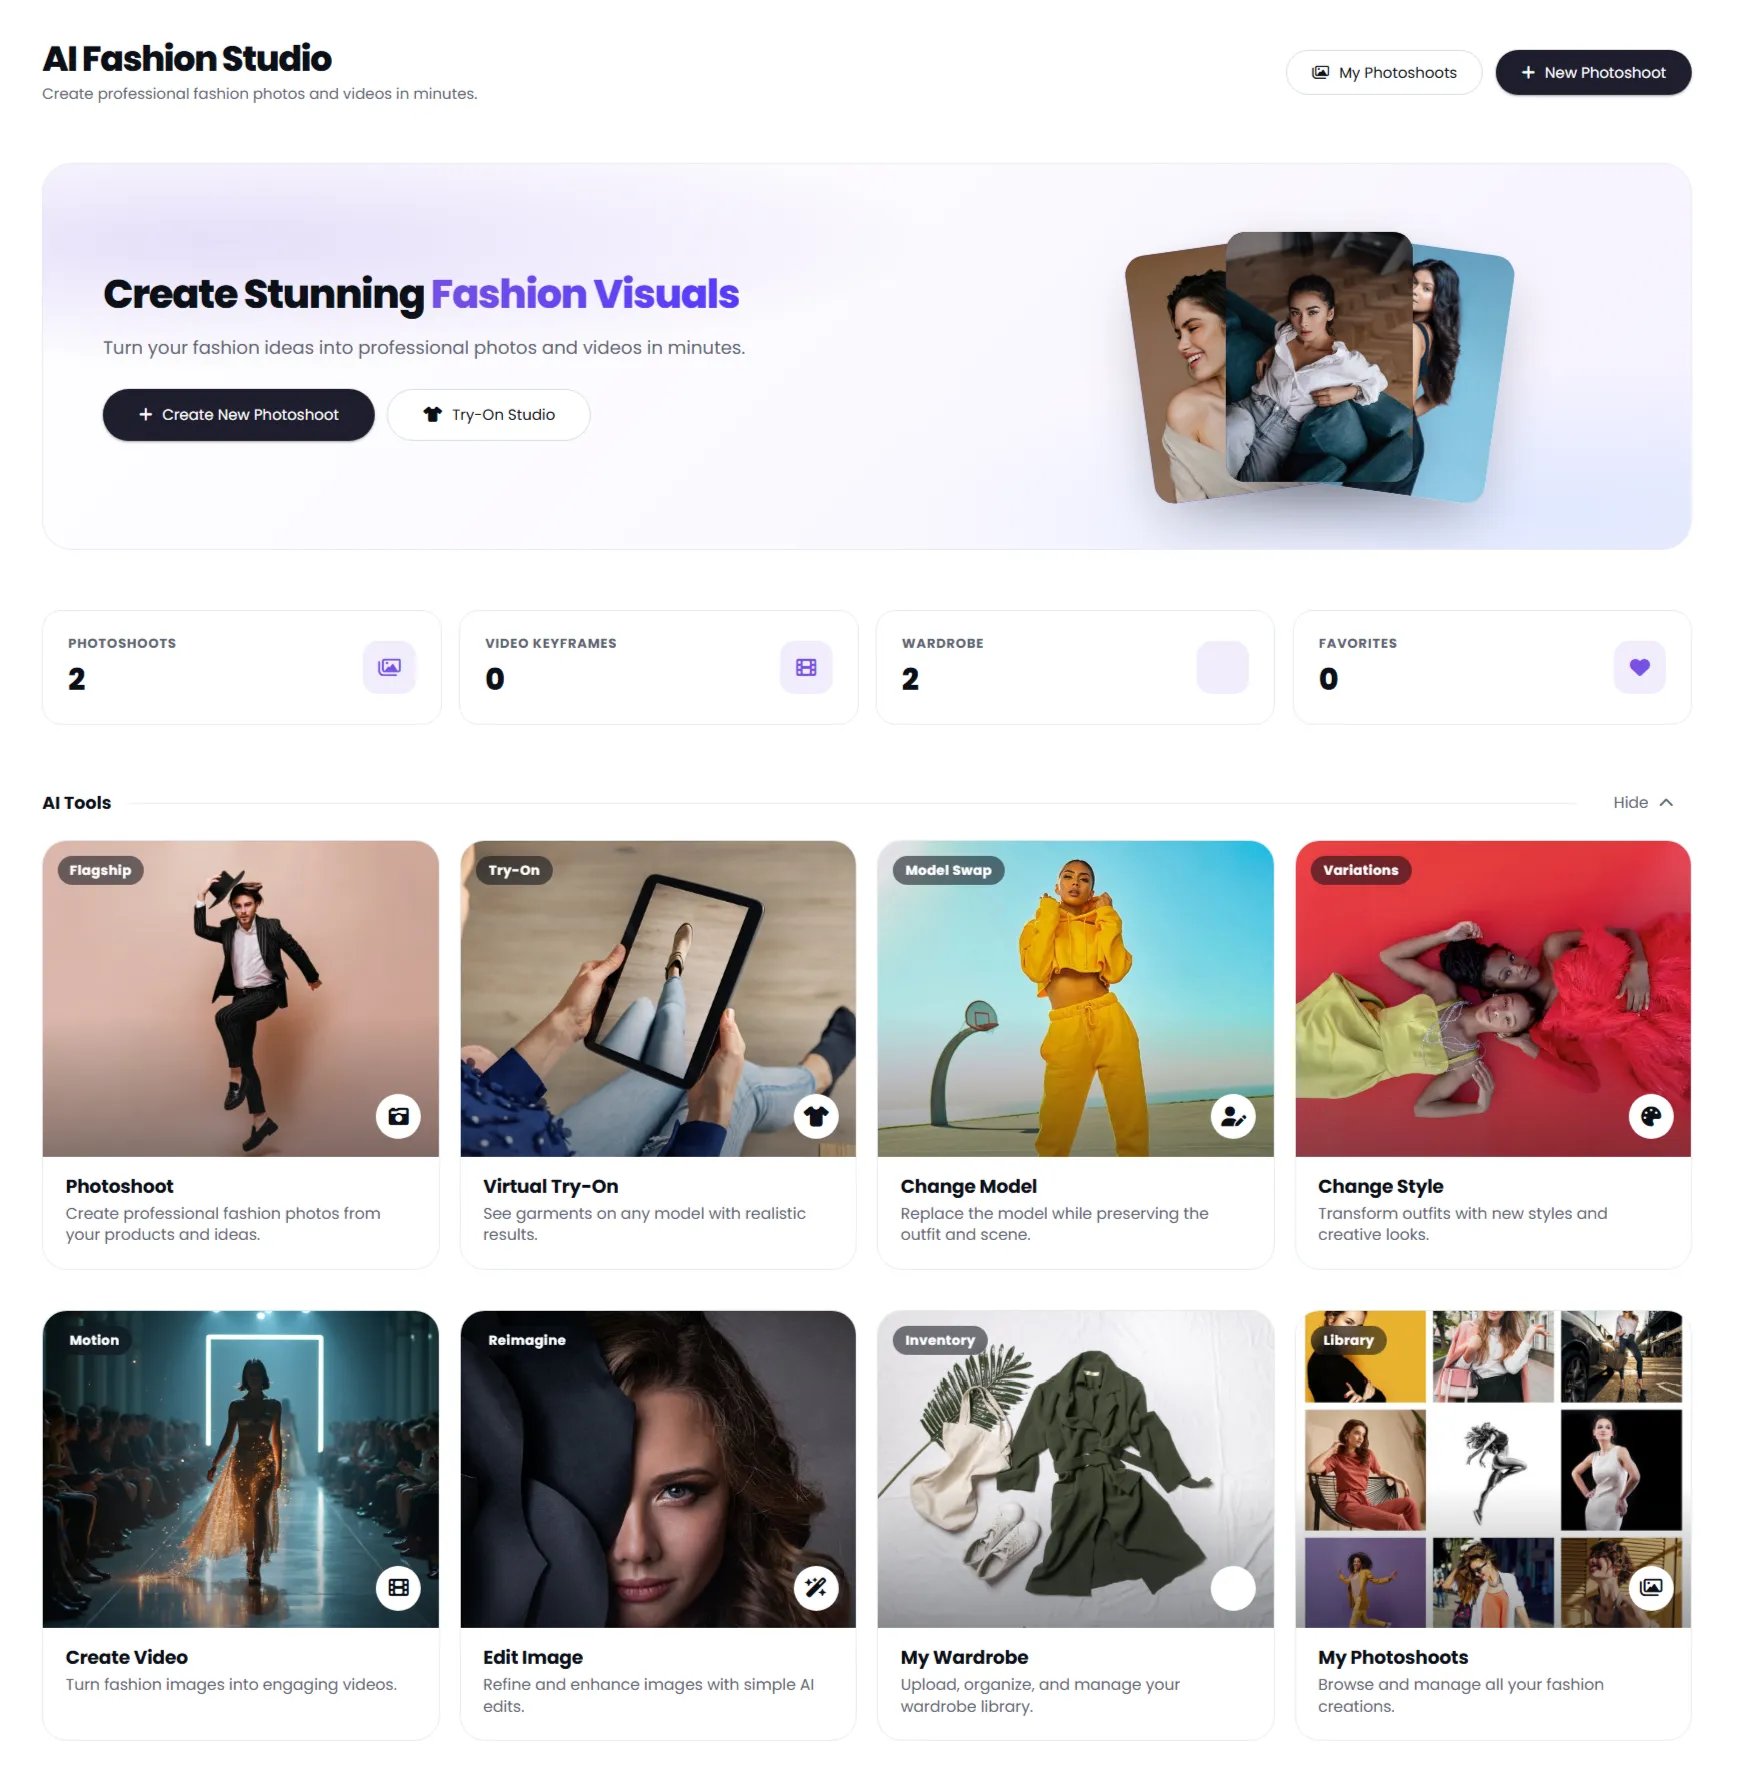
Create a photoshoot
Photoshoot Studio lets you combine products from your wardrobe and generate a complete fashion scene.1. Select your products
In Pick your products, choose up to three wardrobe items. You can select items from My Wardrobe, upload new items, or generate an item with AI. The example below has two products selected.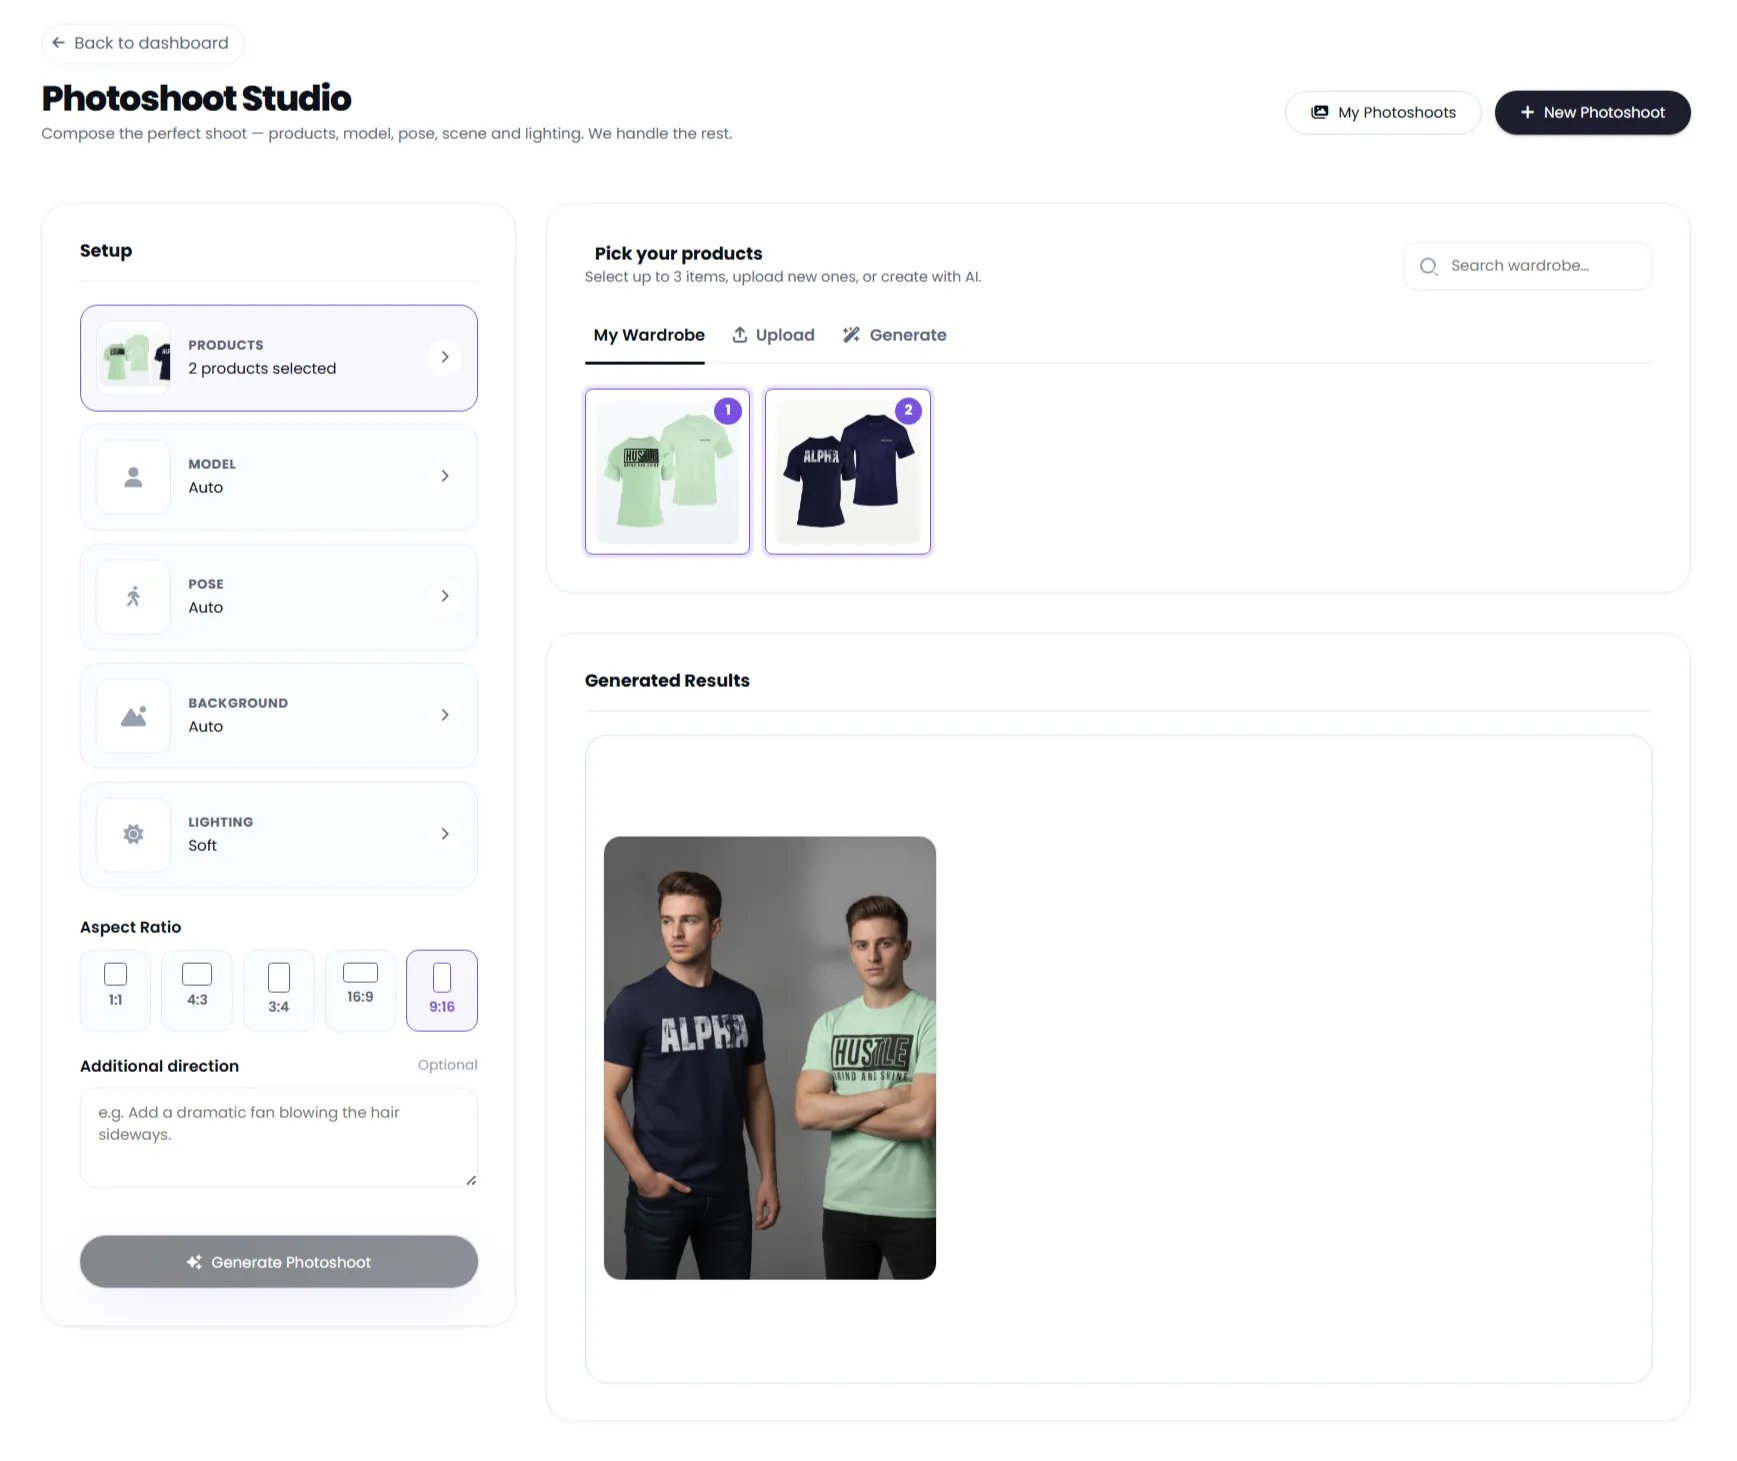
2. Configure the shoot
The setup panel provides controls for:- Products
- Model
- Pose
- Background
- Lighting
- Aspect Ratio
- Additional direction
3. Choose an aspect ratio
Select the format that matches where you plan to use the image. The available options shown are:- 1:1
- 4:3
- 3:4
- 16:9
- 9:16
4. Add additional direction
Use Additional direction when you want to give the generation extra creative guidance. For example, you can describe a specific visual action or atmosphere. Keep the instruction focused on what you want the final fashion image to communicate.5. Generate the photoshoot
Click Generate Photoshoot. Klyra AI creates the fashion visual using the selected wardrobe and creative settings. The generated result appears in the Generated Results area.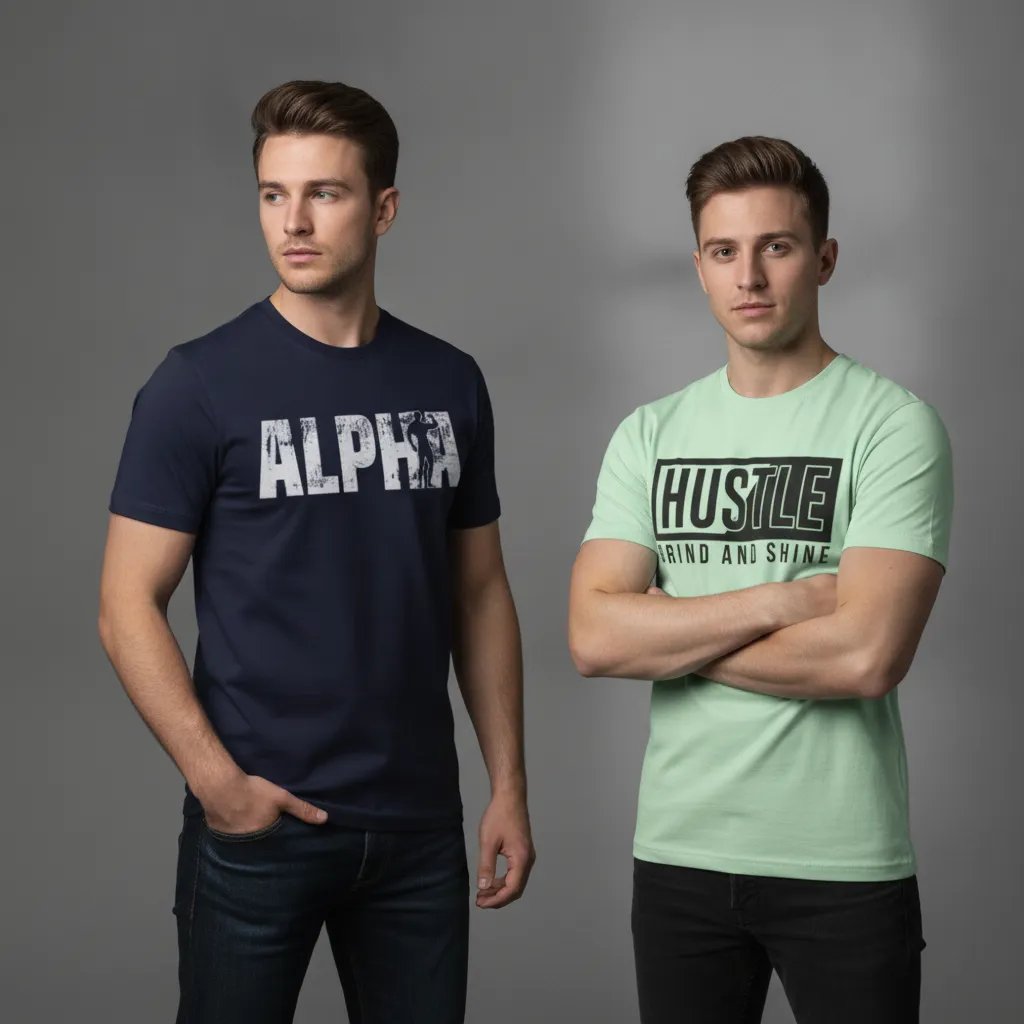
Use Virtual Try-On Studio
Virtual Try-On Studio is designed for dressing a model with garments from separate product images. It uses a slot-based workflow so you can build an outfit piece by piece.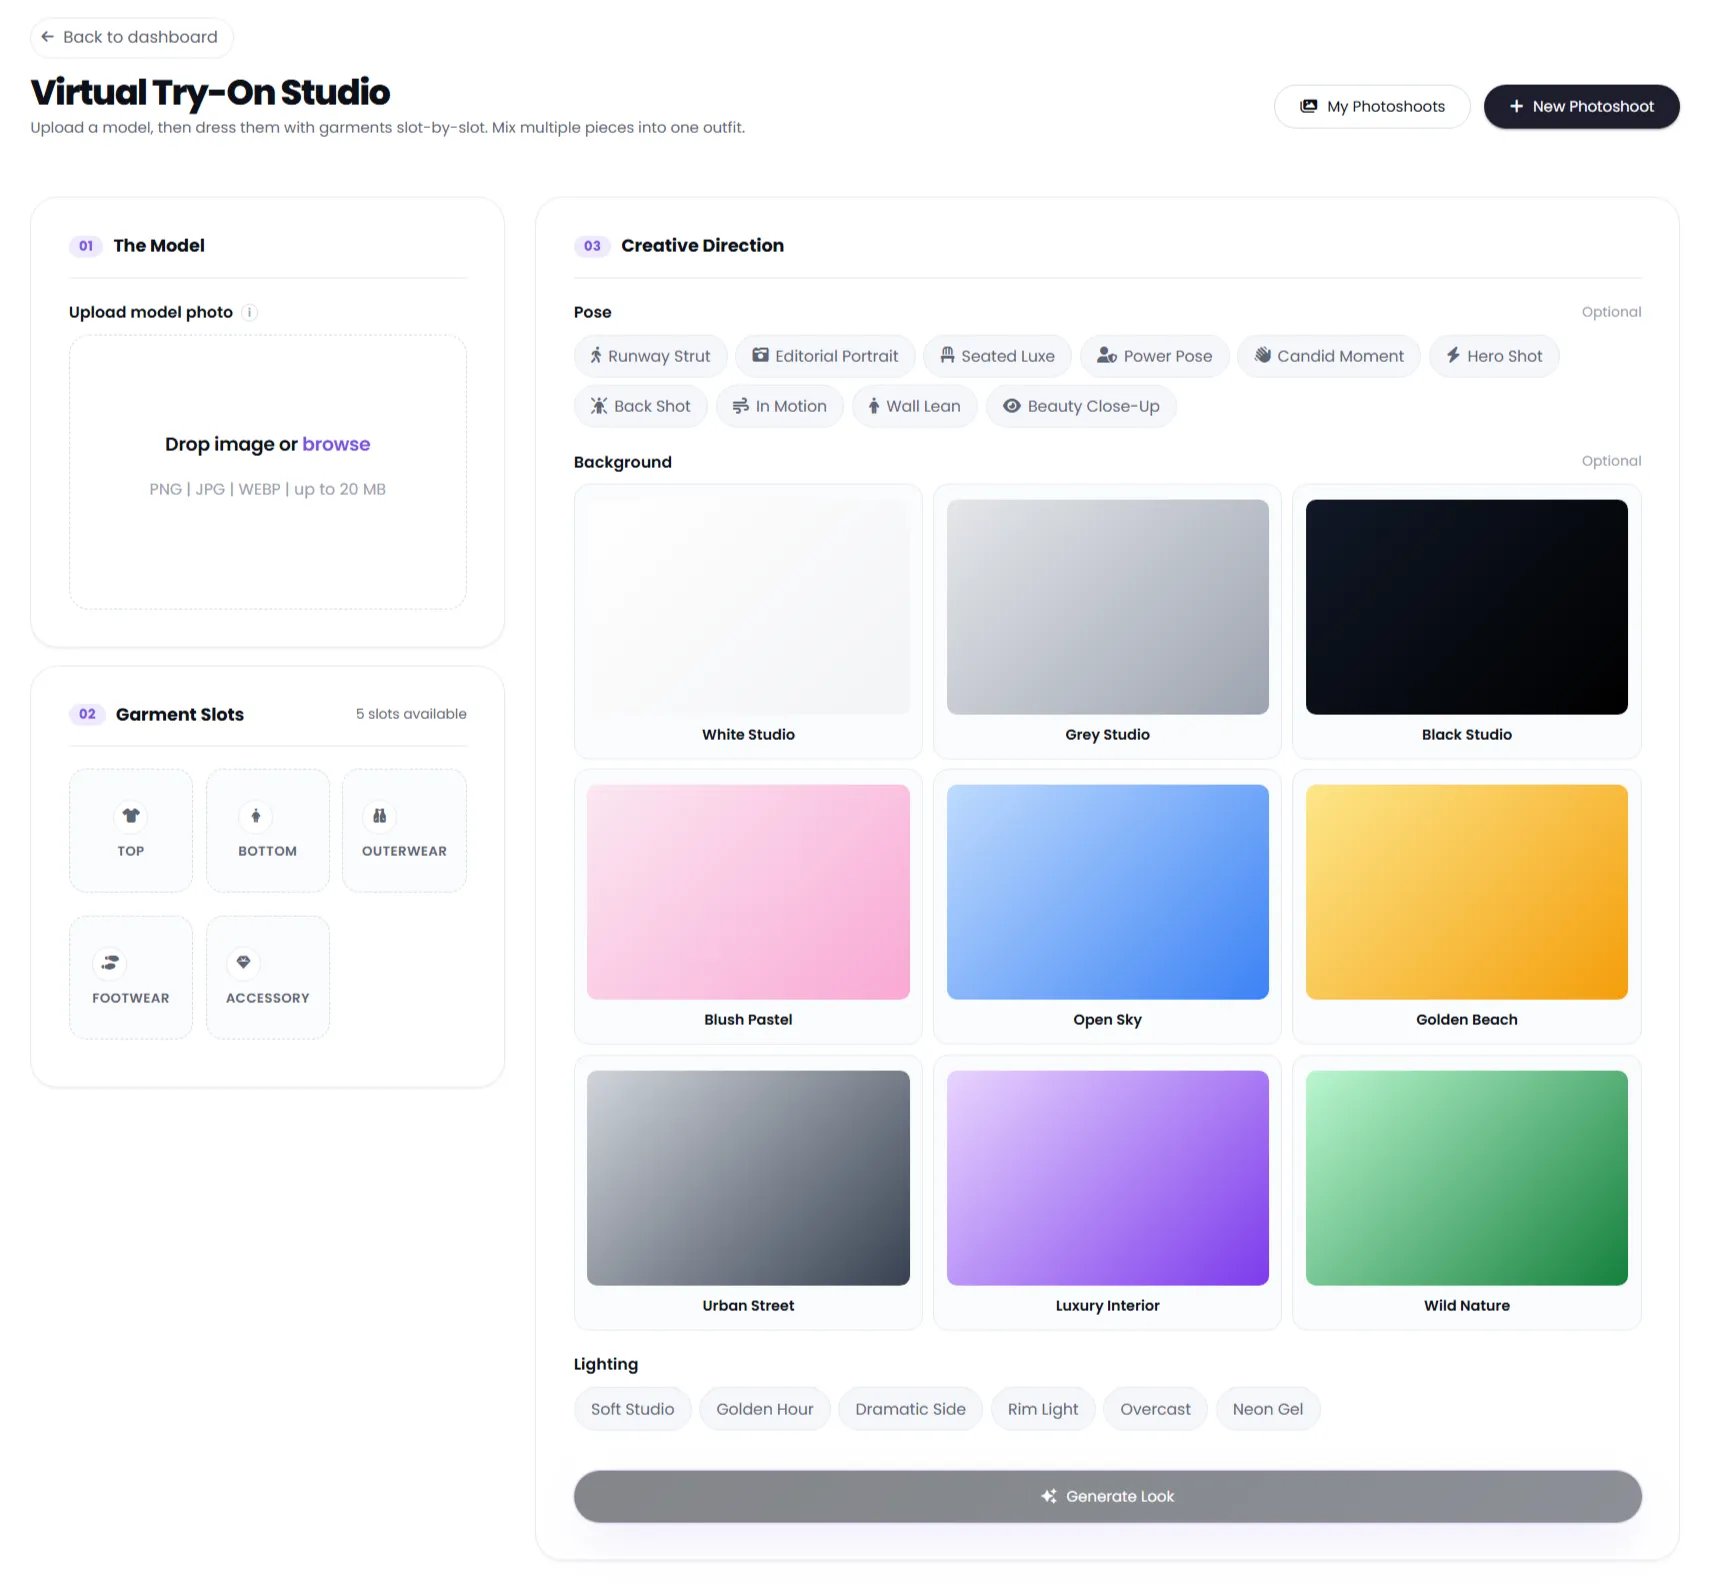
1. Upload the model
Under The Model, upload the model photograph. You can drag an image into the upload area or use browse. The interface accepts:- PNG
- JPG
- WEBP
- Files up to 20 MB
2. Add garments to slots
The Garment Slots section provides five available categories:- Top
- Bottom
- Outerwear
- Footwear
- Accessory
3. Set the creative direction
The Creative Direction section lets you define the visual treatment.Choose a pose
The interface includes pose presets such as:- Runway Strut
- Editorial Portrait
- Seated Luxe
- Power Pose
- Candid Moment
- Hero Shot
- Back Shot
- In Motion
- Wall Lean
- Beauty Close-Up
Choose a background
You can select from studio and environmental backgrounds including:- White Studio
- Grey Studio
- Black Studio
- Blush Pastel
- Open Sky
- Golden Beach
- Urban Street
- Luxury Interior
- Wild Nature
Choose lighting
Available lighting presets shown in the interface include:- Soft Studio
- Golden Hour
- Dramatic Side
- Rim Light
- Overcast
- Neon Gel
4. Generate the look
Once the model, garments, and creative direction are ready, click Generate Look. Klyra AI creates the dressed model while applying the selected creative settings.Change the model
Change Model lets you replace the model in an existing fashion image while preserving the rest of the visual direction.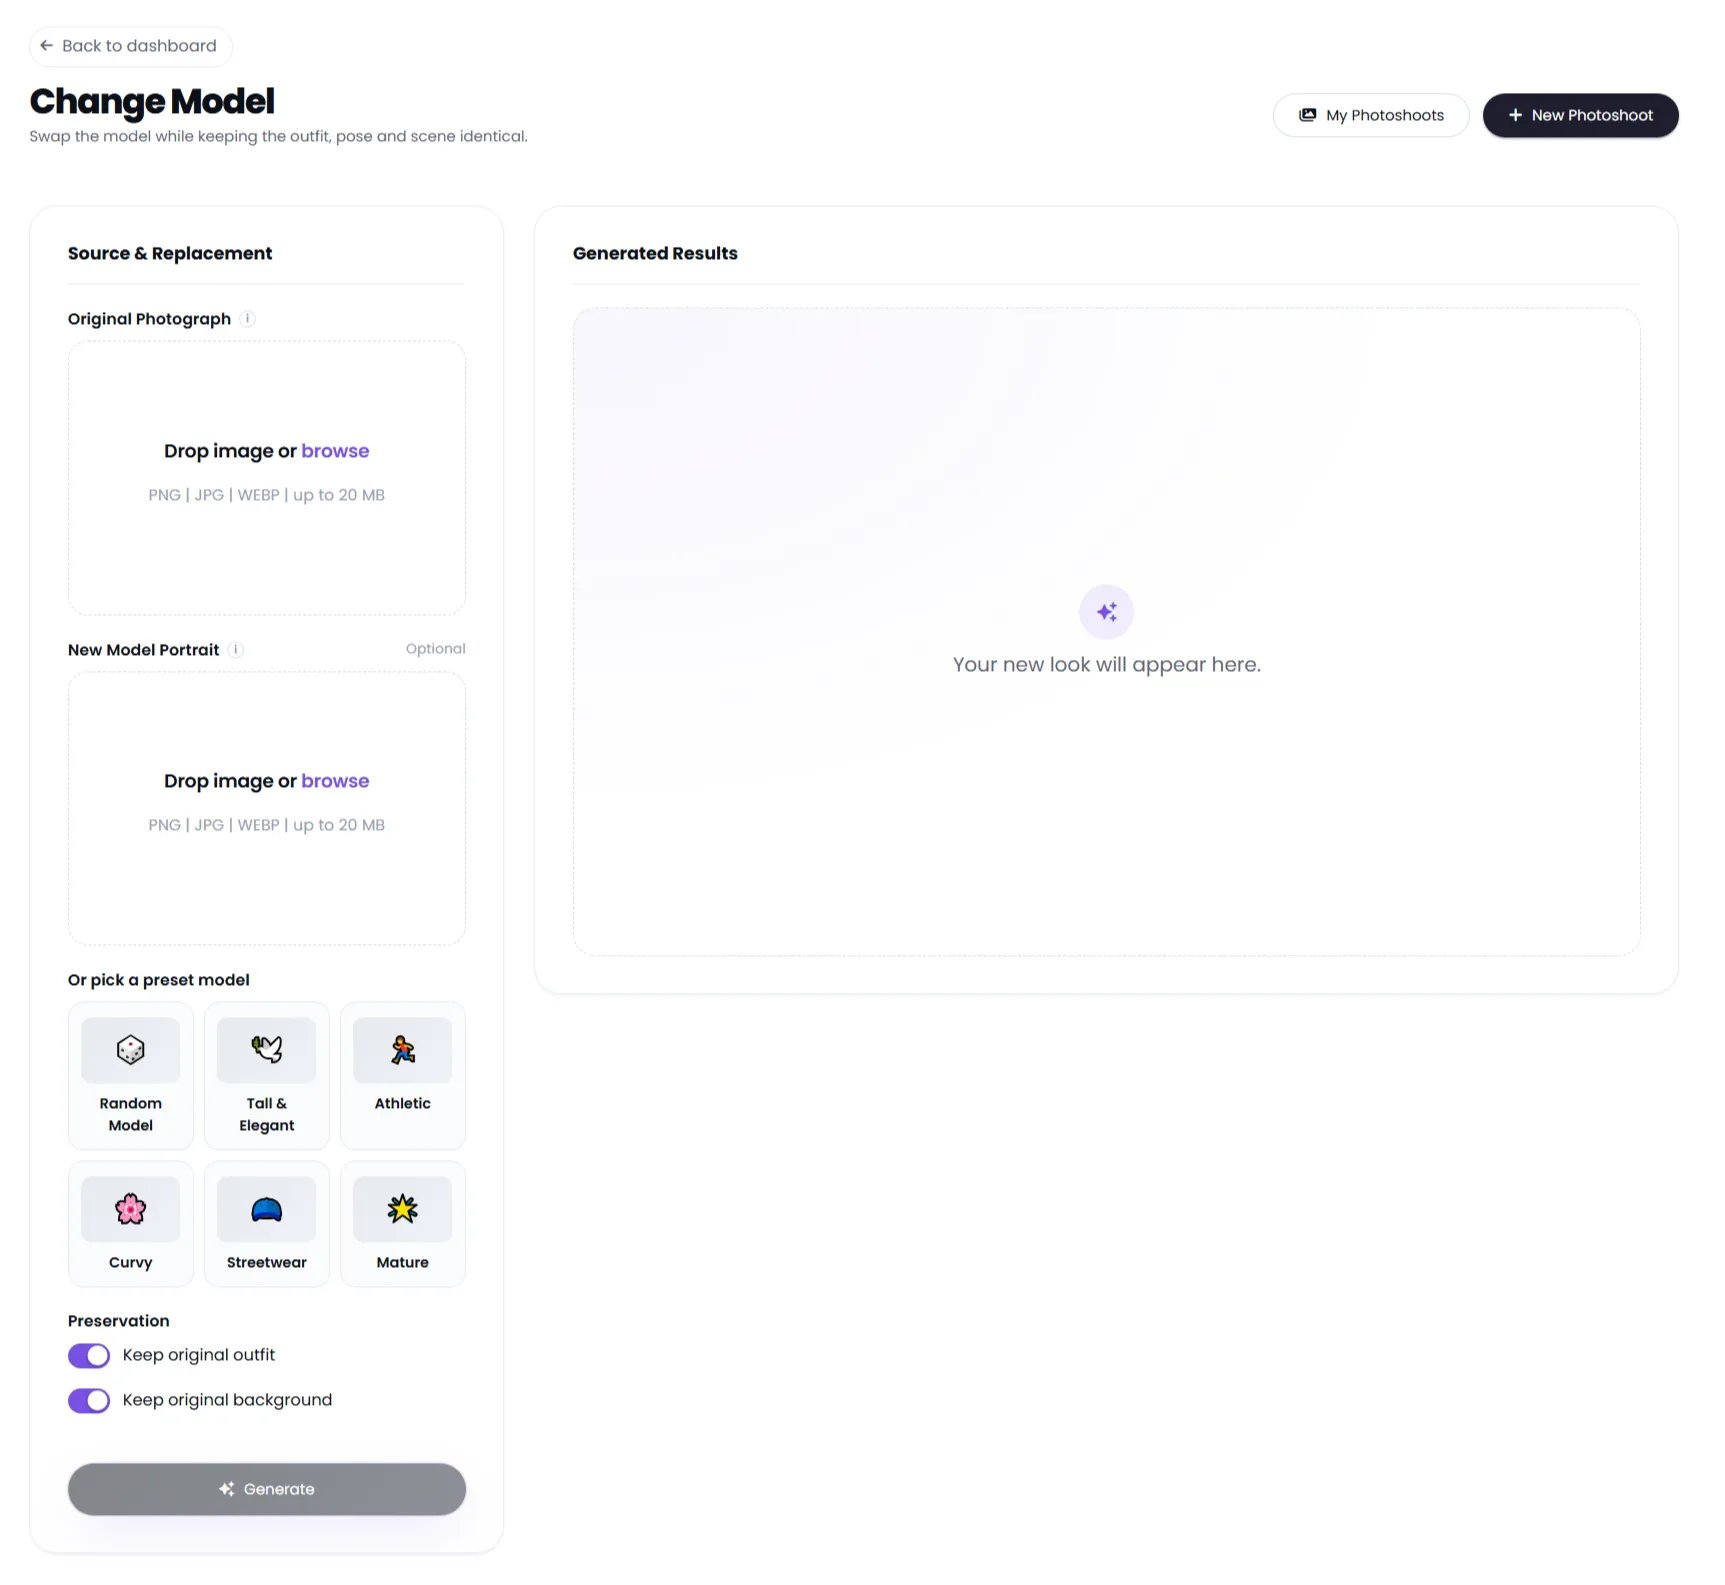
1. Upload the original photograph
Under Original Photograph, upload the fashion image you want to modify. You can drag the image into the upload area or use browse. Supported formats shown in the interface:- PNG
- JPG
- WEBP
- Up to 20 MB
2. Choose the new model
Under New Model Portrait, upload a portrait of the model you want to use. This field is optional in the interface because you can instead select a preset model.3. Use a preset model
The available preset choices shown are:- Random Model
- Tall & Elegant
- Athletic
- Curvy
- Streetwear
- Mature
4. Preserve the original
Two preservation controls are available:- Keep original outfit
- Keep original background
5. Generate
Click Generate. The new result appears in Generated Results. The workflow is designed specifically to change the model while keeping the outfit, pose, and scene consistent.Create a fashion video keyframe
The Create Video workflow transforms a still fashion image into a cinematic motion concept.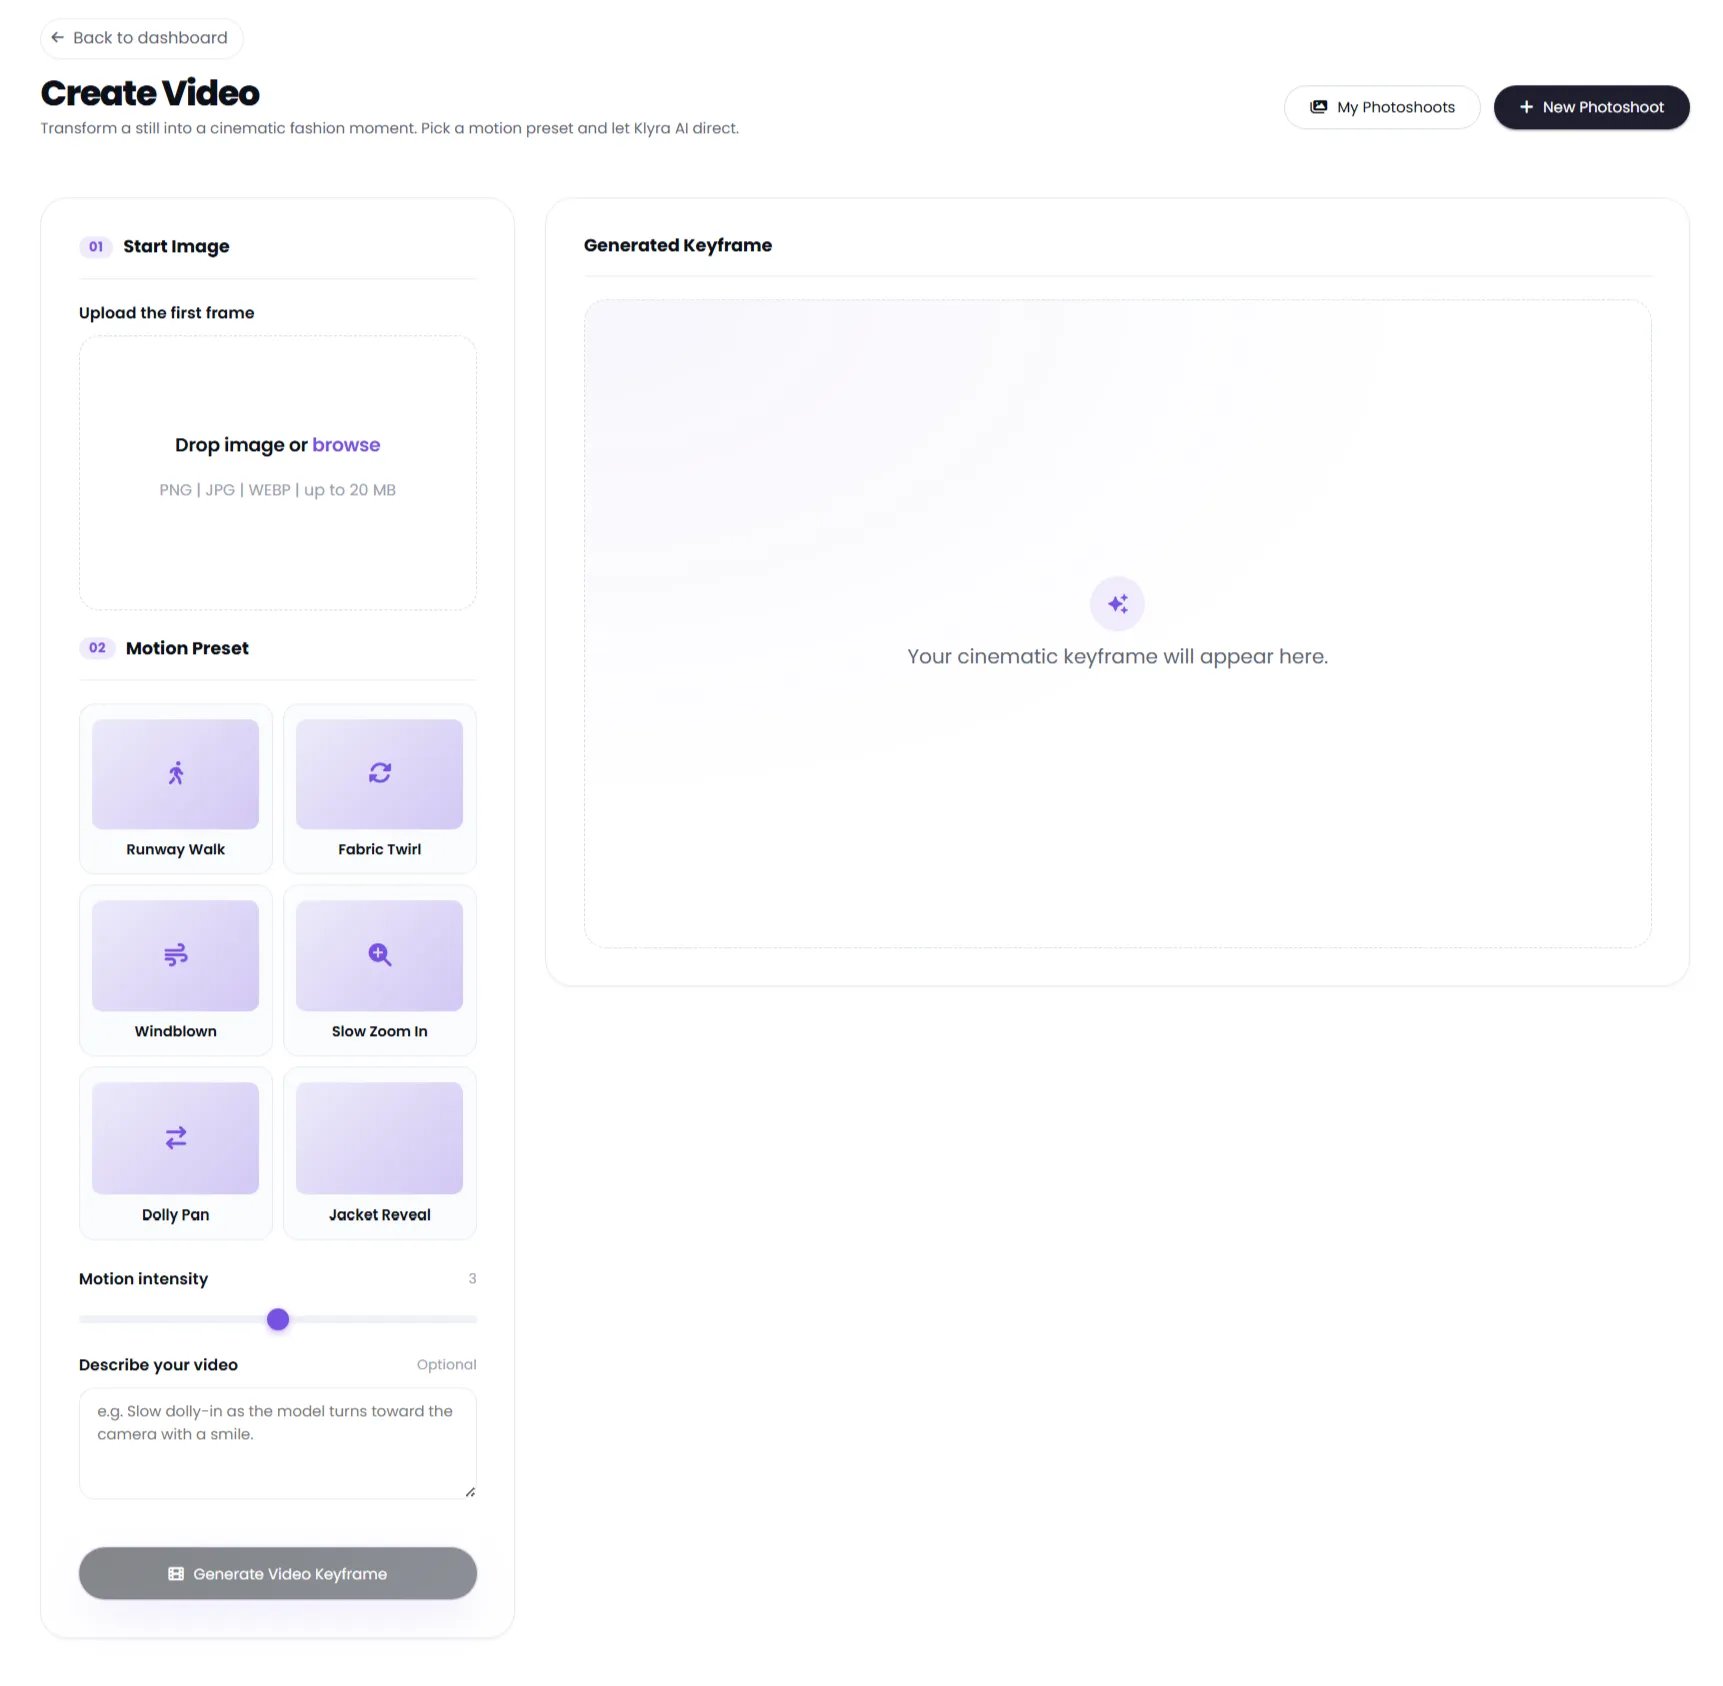
1. Upload the start image
Under Start Image, upload the first frame. The interface accepts:- PNG
- JPG
- WEBP
- Up to 20 MB
2. Choose a motion preset
The available motion presets shown are:- Runway Walk
- Fabric Twirl
- Windblown
- Slow Zoom In
- Dolly Pan
- Jacket Reveal
3. Adjust motion intensity
Use the Motion intensity slider to control how strongly the selected motion should be expressed. The example screen shows the intensity set to 3.4. Describe the video
The optional Describe your video field lets you add additional direction. For example, you can describe the camera movement, model action, or overall cinematic behavior you want the keyframe to communicate.5. Generate the keyframe
Click Generate Video Keyframe. The generated result appears in Generated Keyframe.Manage your fashion assets
AI Fashion Studio is designed around reusable fashion assets. The dashboard provides access to:- My Wardrobe for organizing clothing and fashion products.
- My Photoshoots for browsing generated fashion creations.
- Edit Image for refining generated images.
- Change Style for creating alternate outfit aesthetics.
- Create Video for turning still fashion imagery into motion concepts.
Tips for better results
Use clean source images
Upload clear product, garment, model, and portrait images. A clean source makes it easier for the AI to preserve the important visual details.Be intentional with pose and background
For fashion campaigns, select a pose and background that support the purpose of the image. Editorial portraits, runway movement, and lifestyle scenes can communicate very different visual directions.Reuse wardrobe items
Keep frequently used garments in My Wardrobe so they are available for future photoshoots and Virtual Try-On workflows.Add focused direction
When using an additional direction or video description, describe the specific result you want instead of adding unnecessary instructions.Quick workflow
For a fast fashion campaign:- Open AI Fashion Studio.
- Add products to My Wardrobe if they are not already available.
- Open Photoshoot and select up to three products.
- Choose the model, pose, background, lighting, and aspect ratio.
- Generate the photoshoot.
- Use Change Model when you need another model with the same visual setup.
- Use Virtual Try-On when you need to combine separate garments into an outfit.
- Use Create Video when you want to turn a still into a cinematic motion keyframe.
- Keep the resulting work in My Photoshoots for reuse and management.